Her Concealed Carry Journey, Part 2
![]() May 2nd, 2020
May 2nd, 2020
![]() 5 minute read
5 minute read
In this second part (you can see part one here) of a series on obtaining a concealed carry license (CCL), Elizabeth Buerling learns how to shoot using a two-handed grip, what a “point of aim, point of impact” sight picture is and how to do a proper trigger press for a factory, striker-fired gun. In the first part of the series, I introduced Elizabeth, a Bullseye and International Pistol National Champion. Since her shooting disciplines require one-handed shooting, a very light trigger, slow-aimed fire and a 6 o’clock hold sight picture I decided to start with those differences. Yes, defensive shooting is quite a bit different.
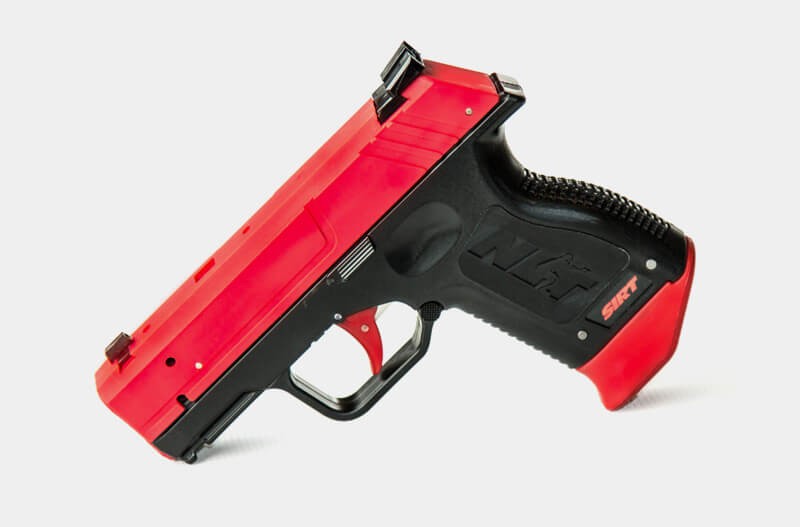
SIRT Training Pistol
Even though on the live-fire range, Elizabeth will be shooting a Springfield XD Mod.2 4″ barrel, in 9mm, we are going to begin by using a SIRT Training Pistol in the comfort of the house. Note: The following can also be done using a functioning pistol, however, make sure to triple check there is no ammunition in the gun or in the room while dry practicing.
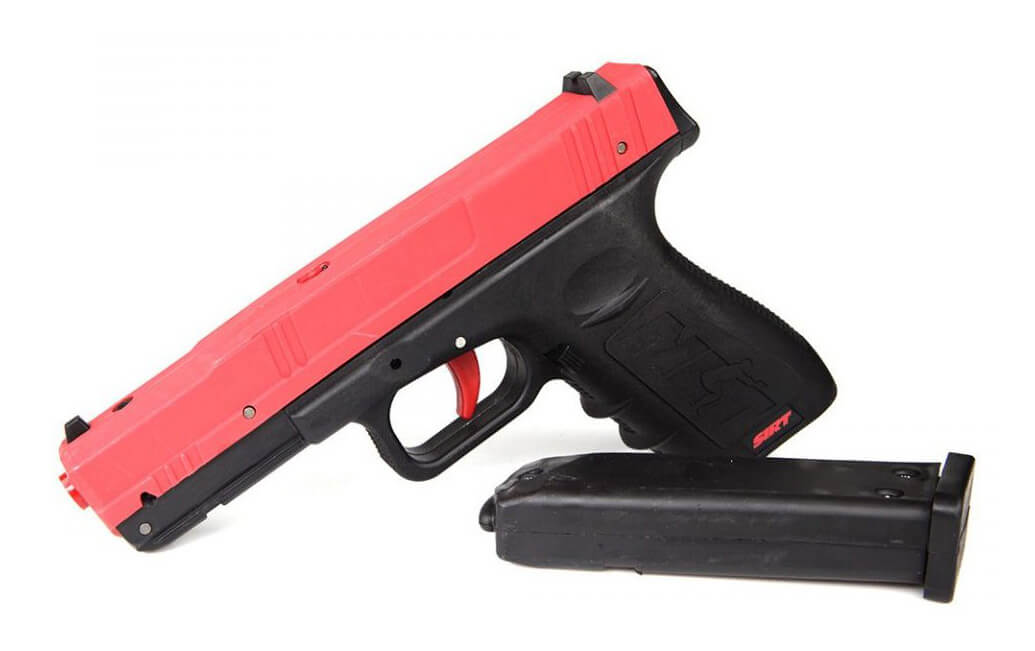
A SIRT Training Pistol is an inert handgun with the weight of a fully loaded pistol, a removable magazine, laser and a Shot Indicating Resetting Trigger (SIRT). Since this is a non-functioning gun, it’s the perfect tool for dry fire practice and learning the fundamentals of shooting in a relaxed environment.
Grip
The modern grip is called the high, thumbs-forward grip. The shooter’s grip is high on the gun, high to the axis of recoil. Thumbs are pointed forward, as if there are flashlight beams shooting out the ends of them and illuminating the target.

The strong or dominant hand is placed as high to the backstop as possible. This allows the middle finger to firmly sit high and tight against the lower trigger guard. The dominant-hand grip pressure is best described as a front-to-rear pressure. Think of using the lowest, largest pads of your middle and ring fingers to pull the grip straight back into the big meaty section of your palm.
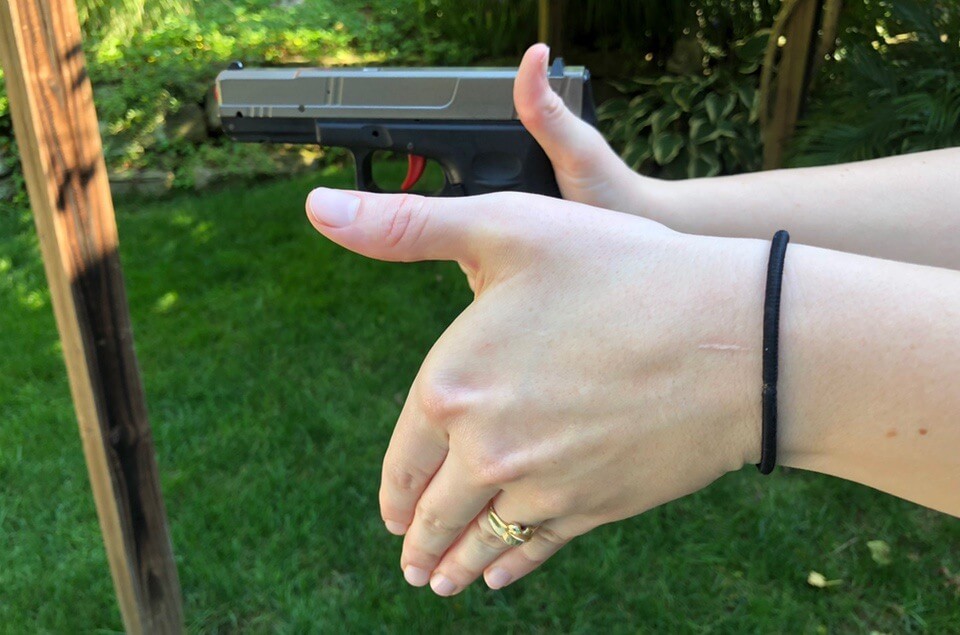
Now, angle your strong thumb upward to create space for your other hand to move in. The weak hand, or non-dominant hand, now fills in the hole left by the strong hand — with the goal being more meat on the gun. With a side-to-side grip pressure, the non-dominant hand’s fingers wrap around the fingers of the strong hand while locking onto knuckles. I place my thumb along the frame (some pistols have a tactile area right where your thumb should sit). Others actually curl it down. Your strong hand thumb can now lie on the weak hand’s thumb knuckle, pointed forward but off to the side. Make sure it’s not tight along the slide.
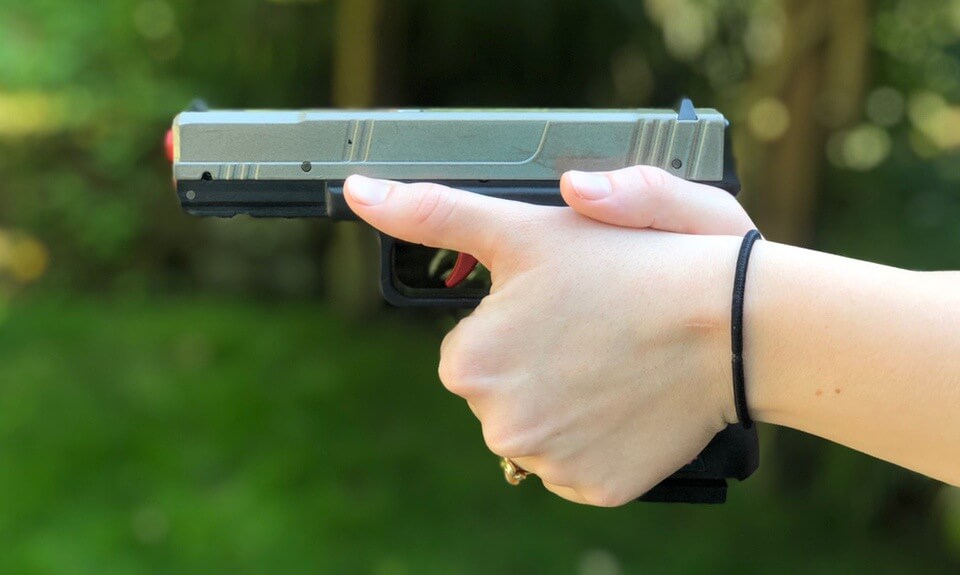
As for grip pressure, some people say, “Squeeze the gun until you start to shake and then back off till the shake stops.” Others say, “Use 40% tension with your strong hand and 60% tension with your weak hand.” I know if my shots start to migrate left, I need to strengthen my support hand (I’m right-handed). And if my shots go low left, I have a bad trigger press and often relaxing my grip a bit on my strong hand allows my trigger finger to work more independently.
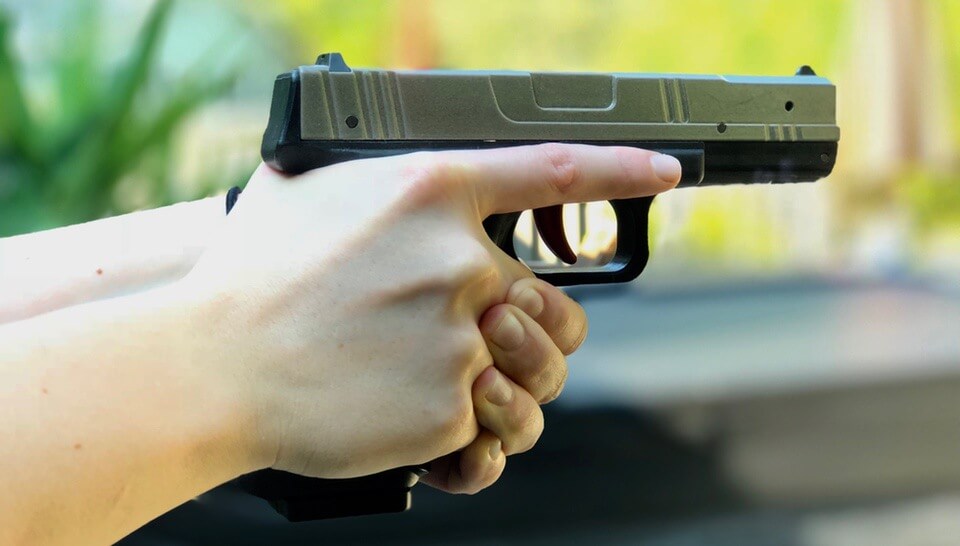
Trigger Control
Trigger control is applying steady pressure to the trigger, directly rearward in such a fashion to not disturb the sight alignment or sight picture before and while the round fires. How that is accomplished is often taught differently, depending on the trainer. The following is how we teach trigger control at Cerino Consulting and Training Group, and how I’m teaching Elizabeth to shoot.
Live The Armory Life. The latest content straight to your inbox plus an automatic entry to each of our monthly gun giveaways!
First of all, since different triggers have different weights, and everyone has different strengths in their hands and fingers I told Elizabeth she may have to change what part of her trigger finger she uses when she is switching between guns. Her main objective with the SIRT Training Pistols is to learn how to press the trigger and not to disturb the sights.
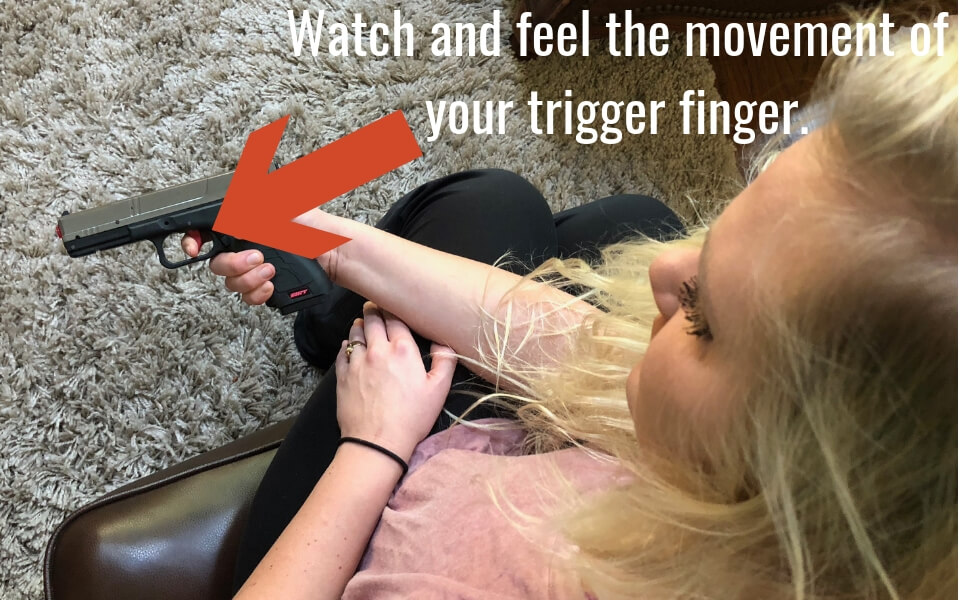
To learn trigger press, Elizabeth sat with the SIRT on her lap, holding the gun in a way that she could watch her finger as she pressed the trigger. The goal being to both see and feel the amount of slack the trigger has before coming to the resistance or “pressure wall.” For accurate hits, all shots need to be taken from the pressure wall. She worked through the trigger numerous times; coming through the slack, meeting the pressure wall, pressing the trigger, letting it fully forward and quickly returning to the pressure wall for the next shot. Once she understood slack and pressure wall, Elizabeth moved on to practicing trigger press. Note: If you are using an empty, functioning pistol, you will need to rack the slide for each shot while practicing trigger press.
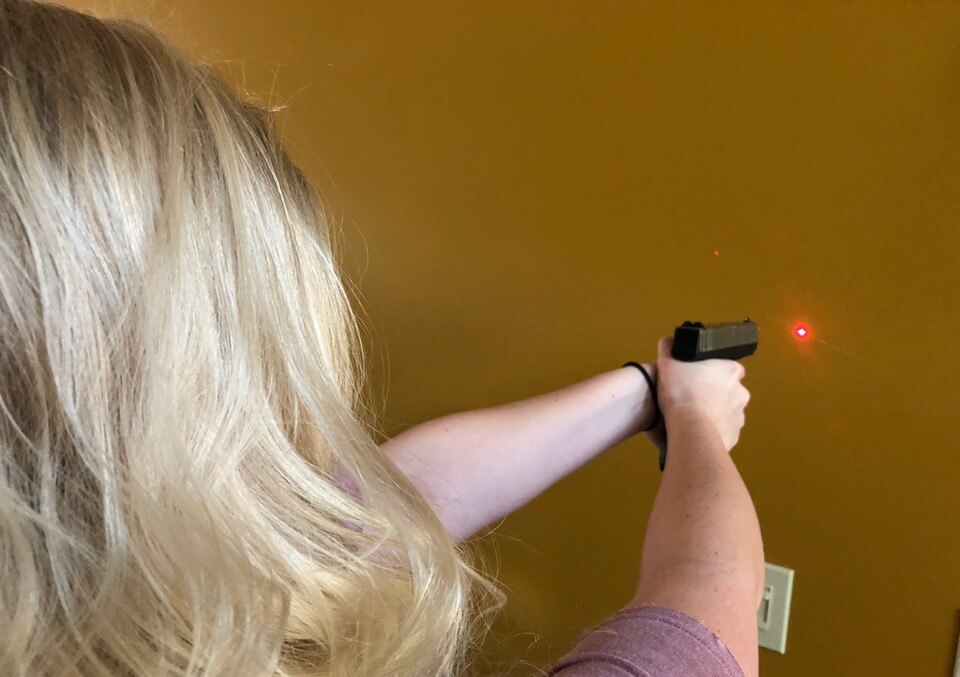
Practicing Trigger Press
- Stand facing a light colored, blank wall. Stand about 2 feet more more than an arm’s length away.
- Using a proper grip, align the sights. Make sure not to aim at anything, just face the blank wall.
- Press the trigger while watching the sights.
- If there is any movement or disturbance in the sights, change your trigger finger placement and/or grip pressure.
- Continue practicing until you can press the trigger and not disturb the sights.
Sight Picture
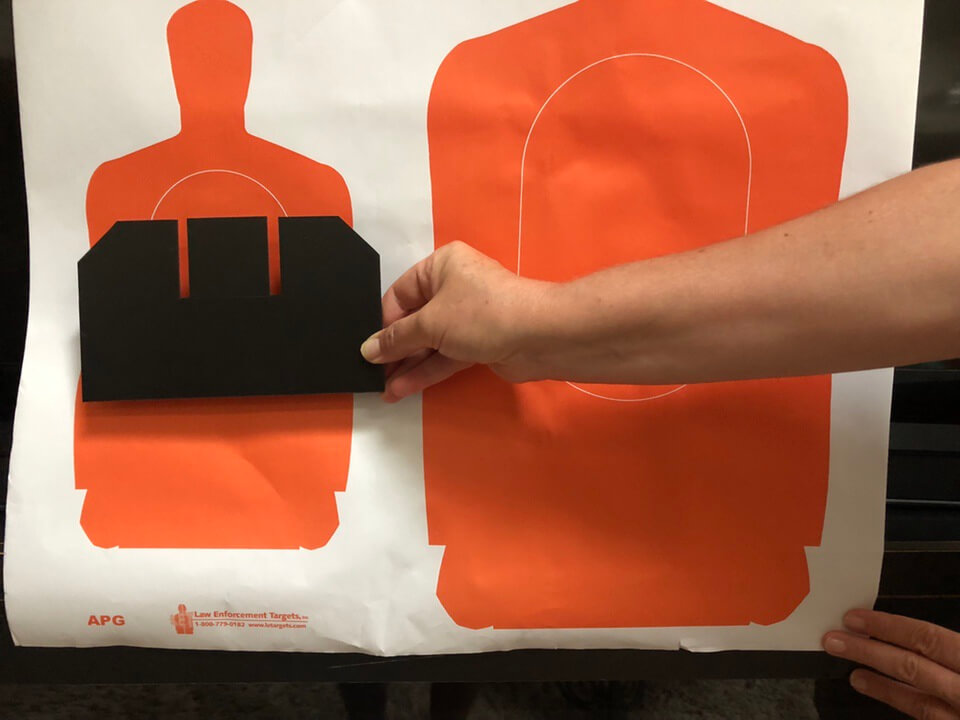
Since Elizabeth shoots bullseye competitions, she’s used to a lollipop sight picture or a 6 o’clock hold. This is very different than factory guns. Out of the box they are usually set up to shoot point of aim, point of impact. To help Elizabeth visualize this different sight picture, I used some training aids we created and a paper target hung on the wall.
Concealed Carry Journey
Although this may seem like baby steps, it’s extremely important for new shooters to learn the fundamentals and become comfortable handling firearms before they head out to the range. Over the next few months, as Elizabeth continues her concealed carry journey, we will look at gear and then, head to the range for live fire.
Read part one of the series here, part three of the series here, part four of the series here, and part five of the series here.
Editor’s Note: This article was written by Michelle Cerino and shared with us by Women’s Outdoor News. Also, be sure to check out The Armory Life Forum, where you can comment about our daily articles, as well as just talk guns and gear. Click the “Go To Forum Thread” link below to jump in!
Join the Discussion
Featured in this article
Share


Continue Reading
Did you enjoy this article?

 61
61
Springfield Armory® recommends you seek qualified and competent training from a
certified instructor prior to handling any firearm and be sure to read your owner’s manual. These
articles and videos are considered to be suggestions and not recommendations from Springfield Armory. The views
and opinions expressed on this website are those of the authors and do not necessarily reflect the
views and opinions of Springfield Armory.
Product prices mentioned in articles and videos are current as of the date of publication.

Michelle Cerino
Michelle Cerino is the managing editor at Women’s Outdoor News and author of Gear Up, sponsored by Springfield Armory and Princess Gunslinger. She also freelances for other industry magazines including Combat Handguns, Person Defense World and New Pioneer Magazine. Michelle is the president of Cerino Consulting and Training Group LLC, a firearms training company she built with her husband Chris in 2011. They instruct both civilians and law enforcement. Her path in the firearms and outdoors industries is ever progressing. She is writing, hunting, competing and doing contract work for major manufacturers. Michelle is a proud Life Member of the NRA, and also belongs to NSSF, AG&AG and ILEETA.
