
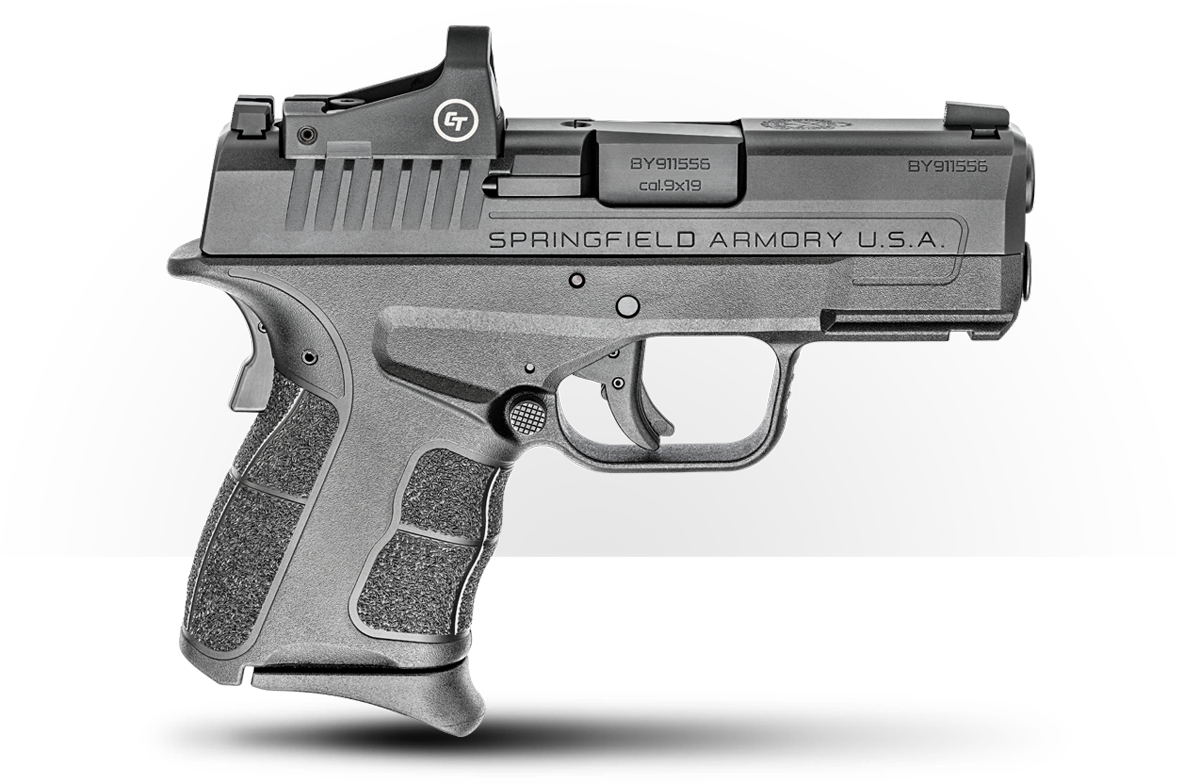
In this article, we’ll walk through the steps and best practices for installing the popular Crimson Trace CTS-1500 red-dot optic onto the Springfield Armory XD-S OSP. While the XD-S OSP can be purchased with the optic, many buyers opt to save money initially by getting the OSP without the optic and adding it later.

Let’s start by getting all the things we might need together and prepare the workspace for the job. I find that any job goes much easier with a little planning and preparation. For this task, this was the list of items I had ready on the work table before I began:
- The XD-S slide, field stripped
- The CTS-1500 red-dot — pre-checked with the battery to insure good working condition
- The battery for the CTS-1500 — a standard CR2032 flat battery — brand new.
- Locktite blue or similar thread lock. It is much more effective if this is applied to the threads of the screws the day before and allowed to dry.
- The screws that were provided with the optic, in this case the Crimson Trace red-dot.
- A screwdriver that you like working with — your favorite ratchet-driver that will accept various bits is perfect.
- A torque-limiting tool if at all possible — with a 15 in/lb. limiter.
- A Torx #T10 head for the screws
Getting Started with the CTS-1500 Installation
The first step is to remove the protective cover from the XD-S OSP. The screws are very small, and they are NOT the ones you’ll use to install the optic. They are for retaining the cover plate on the slide. So, take care not to lose them and be sure to keep them with the cover plate after removal.

Next is a dry fit. I like to ensure that the optic fits in place perfectly, with not only the mounting holes lining up as they should, but also verifying that the unit fits the footprint and indexes. There should be no movement at all once it is in place. With the Crimson Trace CTS-1500 and the XD-S OSP, this is a perfect fit.

The dry fit process also includes locating the proper screws for the job and having them ready and separated from any others. This can be a trial-and-error process, and is perhaps the biggest opportunity to make a serious mistake — so relax and don’t rush this part. I like to drop the proposed screws through the mounting holes of the optic and observe how much thread surface protrudes from the bottom. This is the part of the screw that will go into the threaded holes in the slide. You’re looking for about 1/8” of thread or so. More than that, and you risk damaging the pistol, the optic, or both. At the very least, there’s a strong chance your red dot won’t be attached tightly.
Live The Armory Life. The latest content straight to your inbox plus an automatic entry to each of our monthly gun giveaways!
If the screws look right for length, it’s a good idea to carefully test them in the mounting holes of the slide to be sure they are the proper diameter and thread count. Try using just your fingers for this, but if you must use a screwdriver, be sure to use a delicate feel and not force them. Stripped threads will make those screws useless and you could damage the mounting holes — and that would be bad.
Powerful Choices
Okay, we have the right screws ready to go and they are coated with thread lock. Before we get too excited and start fastening the optic to the slide, we have an important step — install the battery! Because the battery must be installed on the bottom of the optic, it has to be done prior to mounting it or you will have to remove and reinstall your optic. Ask me how I know…

The battery required is a CR2032 and is commonly available. One should have been provided with your optic, but if you’re not sure of its age or condition do yourself a favor and just find a brand new one. The battery is installed by sliding into place against the thin spring connection. The smooth side of the battery with the numbers engraved on it should be facing UP so that you can read it when installed.

Now we’re ready to fasten the optic to the slide. You’ll need the T10 Torx head for this. You can use a regular screwdriver to get the screws all the way to “snug”. At this point, a torque limiter is much preferred — set for 15 inch-pounds. However, if you don’t have access to one, you can proceed to tighten the screws with your regular tool — just be very careful not to over-tighten, as this can cause damage. I like to use the rule of thumb 1/8 to 1/4 turn past “snug”.
Installation Guide Conclusion
That’s it — you’re done! Well almost. You just need to re-assemble the pistol and then go sight in your newly mounted red dot.
Editor’s Note: Please be sure to check out The Armory Life Forum, where you can comment about our daily articles, as well as just talk guns and gear. Click the “Go To Forum Thread” link below to jump in and discuss this article and much more!
Join the Discussion
Featured in this video
Share


Continue Reading
Did you enjoy this video?

 63
63
Springfield Armory® recommends you seek qualified and competent training from a
certified instructor prior to handling any firearm and be sure to read your owner’s manual. These
articles and videos are considered to be suggestions and not recommendations from Springfield Armory. The views
and opinions expressed on this website are those of the authors and do not necessarily reflect the
views and opinions of Springfield Armory.
Product prices mentioned in articles and videos are current as of the date of publication.

Justin Opinion
“Justin Opinion” is a lifelong firearms enthusiast and shooter. The son of a master gunsmith, he makes no claims to such skills but has a deep appreciation for the skillful work of the men and women who design and build great guns. A certified instructor and range safety officer who enjoys the shooting sports, he uses his experiences and those of his friends to apply a real-world perspective to reviews. The Justin Opinion Channel can be found on YouTube, Facebook and Instagram, and his reviews can also be found at GunsAmerica and American Handgunner.
