Low Light Shooting Tactics
![]() April 18th, 2020
April 18th, 2020
![]() 4 minute read
4 minute read
Recently I attended an outdoor low light shooting class. The trainer, Andrew Blubaugh of Apex Shooting and Tactics, works with us and I’ve helped him with a few classes. This nuts-and-bolts, three-hour class allowed me to experience and experiment with some new techniques using a handheld flashlight while shooting.
Why Carry a Flashlight
A handheld flashlight is a great tool to add to your everyday carry routine. When used in unison with a pistol, it provides a great tactical advantage, because flashlights not only illuminate a threat, they also can be disorienting and blinding.
Handheld Flashlights
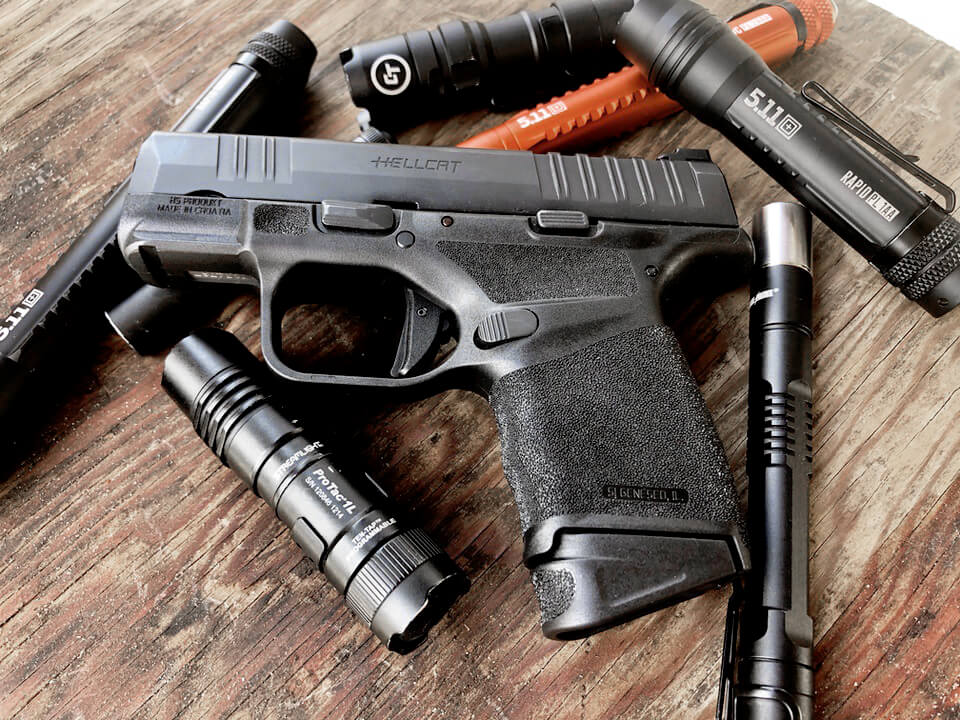
Since this was my first experience shooting low light, I brought along three different handheld flashlights. My goal for the class was to find the best low light shooting technique for me and also, to decide which flashlight I felt most confident using.
Flashlight Lumens
When researching the amount of lumens for an EDC flashlight, I found a variety of answers. Apparently, around 90 to 100 lumens is the minimum to negatively affect the human eye. It also offers enough illumination to see details, such as what a person is holding.
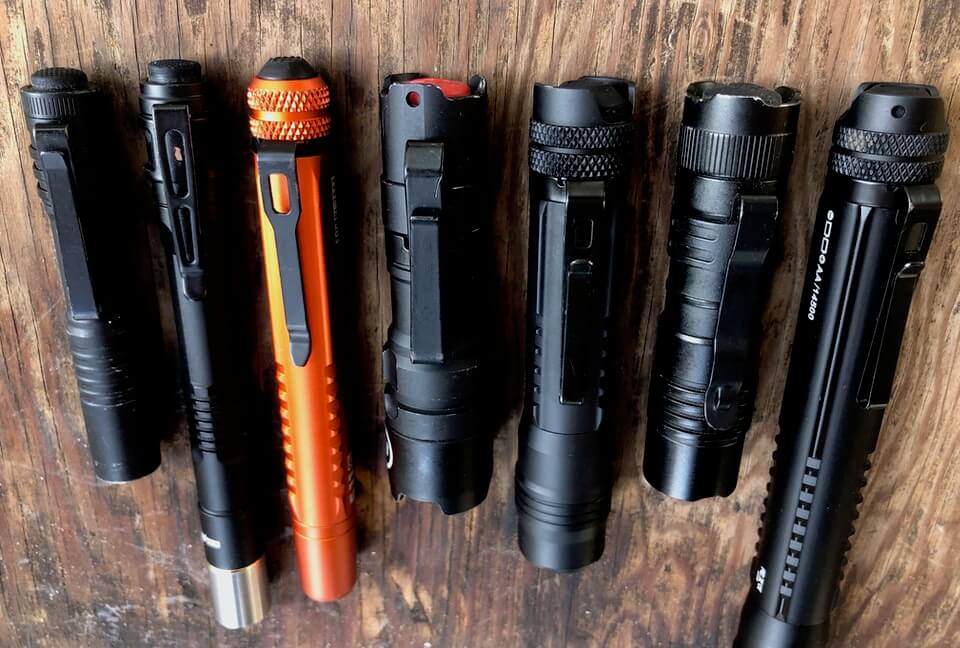
Flashlight Modes
Another consideration when choosing a flashlight is the different modes many offer. The five most common I found include high, medium, low, strobe and SOS. Something to note: the brighter the mode, the shorter the runtime.
Low Light Shooting Techniques
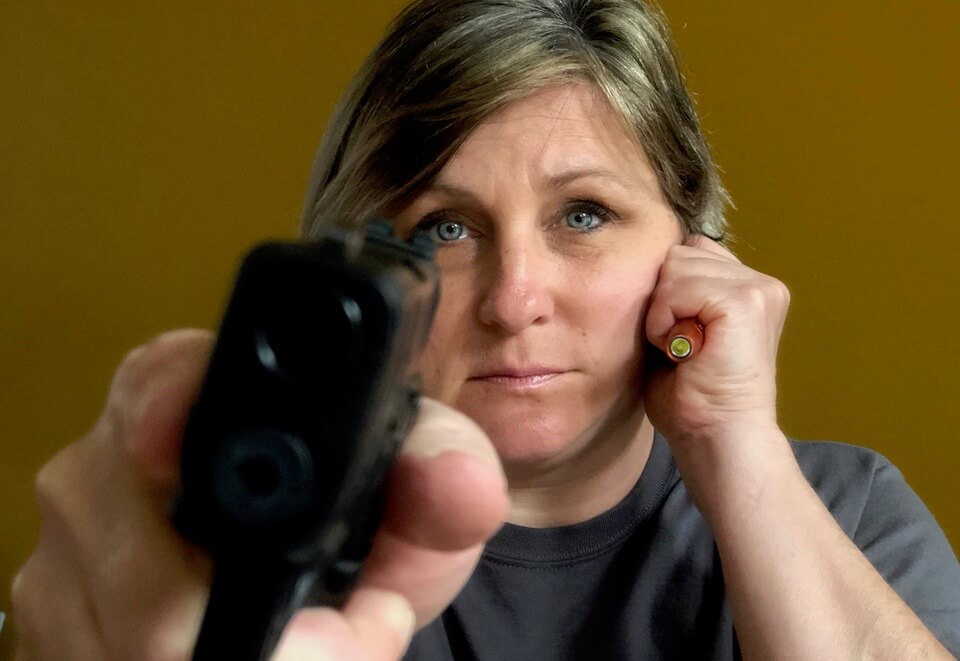
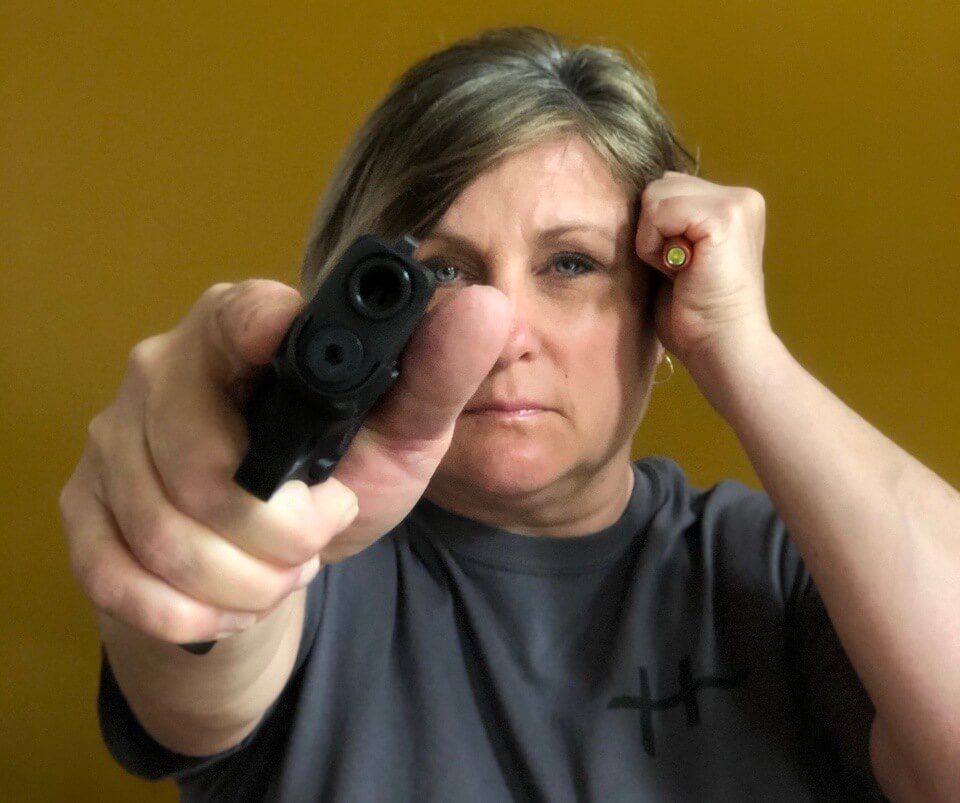
There are numerous one-handed and two-handed techniques for shooting with a handheld flashlight. Some common one-handed techniques are Harries, FBI Technique, and neck (jaw) or temple index. When researching two-handed shooting techniques, I found techniques often named after the persons who made them popular. The most well-known being the Surefire, Chapman, Ayoob and Rogers techniques. During this class, I experimented with temple and jaw indexing. My instructor, Andrew, suggested these methods because they’re not as contrived and don’t lend themselves to pointing the gun at your own hand or something else you don’t intend to shoot.
One-Handed Shooting Tips
The following tips help when shooting with one hand:
- Cant the gun slightly inward. This helps line up your radius and ulna to provide muscular and skeletal alignment.
- Grip the gun using front-to-rear pressure like you’re gripping pliers.
- Think about driving the muzzle of the gun toward the target.
My Low Light Shooting Take-Aways
After experimenting with different sized flashlights, I decided to use a small, thin, longer design. I also like a raised pushbutton to turn it off and on. I can engage this type of button without fumbling, since I went to the class with the intention of finding the right method to confidently grip and operate a flashlight while operating a firearm at the same time.

As for indexing the flashlight, holding it at my temple worked best for me. With this hold, I could aim the beam where I wanted (which, in a self-defense situation, would be in the threat’s eyes) and keep light on or off my gun’s sights. I also prefer a flashlight with just one mode. I found myself accidentally putting on the strobe and low features when I really wanted the brighter light.
Conclusion
Please note, what I wrote above is what I determined worked best for me. I took the time to experiment with a few different low light shooting techniques, as well as various flashlights. As with other aspects of firearms training, it’s important to determine what works best for you. Also, once you choose a technique, you must practice, practice, then practice some more.
Editor’s Note: This article was written by Michelle Cerino and shared with us by Women’s Outdoor News. Also, be sure to check out The Armory Life Forum, where you can comment about our daily articles, as well as just talk guns and gear. Click the “Go To Forum Thread” link below to jump in!
Join the Discussion
Featured in this article
Share


Continue Reading
Did you enjoy this article?

 96
96
Springfield Armory® recommends you seek qualified and competent training from a
certified instructor prior to handling any firearm and be sure to read your owner’s manual. These
articles and videos are considered to be suggestions and not recommendations from Springfield Armory. The views
and opinions expressed on this website are those of the authors and do not necessarily reflect the
views and opinions of Springfield Armory.
Product prices mentioned in articles and videos are current as of the date of publication.

Michelle Cerino
Michelle Cerino is the managing editor at Women’s Outdoor News and author of Gear Up, sponsored by Springfield Armory and Princess Gunslinger. She also freelances for other industry magazines including Combat Handguns, Person Defense World and New Pioneer Magazine. Michelle is the president of Cerino Consulting and Training Group LLC, a firearms training company she built with her husband Chris in 2011. They instruct both civilians and law enforcement. Her path in the firearms and outdoors industries is ever progressing. She is writing, hunting, competing and doing contract work for major manufacturers. Michelle is a proud Life Member of the NRA, and also belongs to NSSF, AG&AG and ILEETA.
