
Editor’s Note: If you’d like to upgrade the factory sights on your Springfield TRP Operator pistol, this is the video for you. Yamil Sued offers a “how-to” video on replacing the stock sights on your 1911.
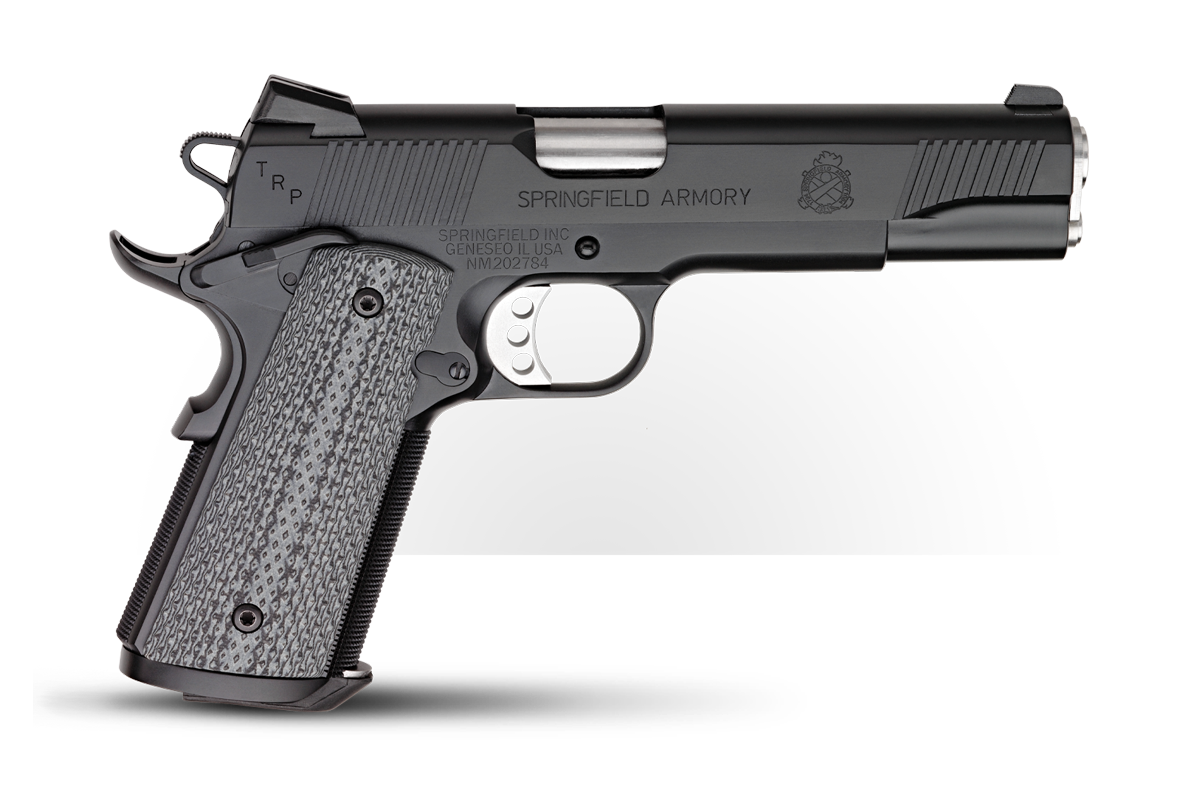
Hello folks, this is Yamil Sued, and today I’m coming to you from C2 Tactical in Scottsdale, Arizona, where I’m spending some time with one of my longtime pistols: the Springfield Armory TRP Operator Tactical in .45 ACP.

I’ve had this pistol for quite a while, and over time, I’ve made a few changes to tailor it more to my personal preferences. None of these changes was necessary, as the pistol worked perfectly well out of the box. But one of the great things about the 1911 platform is how easy it is to make it your own.
Removing the Full-Length Guide Rod
The first modification I made was removing the full-length guide rod. I left the pistol with a standard setup, which leaves a small hole in the front of the reverse plug.
This is purely a matter of personal taste. I’m not saying anyone is wrong for keeping a full-length guide rod, but for me, it makes press checks easier and simplifies the system. I’ve never been a big fan of full-length guide rods, and this setup suits me better.
Upgrading the Sights
The second major change was replacing the sights. There was absolutely nothing wrong with the original sights on this pistol, but I decided to go with a gold bead front sight and a fixed rear sight.

I chose gold for the front because it tarnishes far less than some other materials and stands out clearly. For the rear, I wanted a fixed sight instead of the original Bomar-style adjustable unit.
Why a black rear and a gold front? Simple: personal preference. That’s what works best for my eyes.
Harrison Design: Craftsmanship That Matters
For the sight work, I went to my friend John Harrison at Harrison Design in Canton, Georgia. John does some of the best sight replacement work in the industry for 1911-style pistols.
This slide had a Bomar cut in the rear and a Springfield Armory cut in the front. John custom-made a gold bead front sight for me and installed one of his fixed rear sights designed to replace adjustable units.

He gave me a choice between a square notch and a U-notch rear sight. I chose the U-notch because I wanted to try something different after years of using square notches.
John asked how the pistol was shooting, and since it was already shooting perfectly, he told me not to send the entire gun — just the slide. I mailed it in a small flat-rate box, and within a few days, the work was done, and the slide was back in my hands.
His prices are fair, the turnaround is fast, and the quality is excellent.
Adjustable vs. Fixed Sights
Both adjustable and fixed sights have their pros and cons.
Adjustable sights let you fine-tune elevation and windage when you change ammunition. Fixed sights are more rugged but harder to adjust. In my case, this fixed setup is hitting exactly where I want it to, so there’s no need to touch it.

When I got the slide back, I added a small amount of Loctite to the dovetails and let it sit for 24 hours. That’s all that was required.
One major advantage of John’s sights is how rounded they are. There are no sharp edges at all. When I rack the slide by grabbing over the top, sharp Bomar sights can dig into your hand. These don’t. My hands appreciate that.
On the Firing Line
For today’s range session, I’m shooting 230-grain full metal jacket American Eagle ammunition. This is standard range ammo — not premium defensive ammunition — just the kind of rounds you take out to practice and have fun.

I loaded five rounds, even though the magazine holds seven. Sometimes frugality is a virtue.
With the new gold bead front sight and U-notch rear, the pistol performed beautifully. The sight picture is clean and easy to see, and that makes a real difference in how tight your groups can be.
Good sights matter. When you can see them clearly and align them quickly, everything else becomes easier.
Why the 1911 Still Shines
This is what I love about the 1911 platform. It’s like Tinker Toys for grown men.
You can change the sights, the grips, the trigger, the guide rod — almost every component can be tailored to your taste. You can build a pistol that fits you, not the other way around.
Right now, I’m very happy with this setup: no full-length guide rod, and a set of Harrison Design sights that work exactly the way I want them to.
What’s Next
Stay tuned. We’ll be taking this TRP Operator outside to shoot steel and paper, and we’ll also be doing ballistic gel testing with different kinds of ammunition to see what performs best in this pistol.
For now, this is just range ammo and a range session — but it’s a good reminder that small changes, done thoughtfully, can make a great pistol even better.
Join the Discussion
Featured in this video
Share


Continue Reading
Did you enjoy this video?

 29
29
Springfield Armory® recommends you seek qualified and competent training from a
certified instructor prior to handling any firearm and be sure to read your owner’s manual. These
articles and videos are considered to be suggestions and not recommendations from Springfield Armory. The views
and opinions expressed on this website are those of the authors and do not necessarily reflect the
views and opinions of Springfield Armory.
Product prices mentioned in articles and videos are current as of the date of publication.

Yamil Sued
Yamil is a graduate of the prestigious Brooks Institute of Photographic Arts and Sciences in Santa Barbara, CA with a Major in Illustration Photography and Color Technology with over 34 years of professional experience. Yamil started his professional relationship with the Shooting Industry in 1995 and has since worked with companies like Springfield Armory, S&W, Glock, FNH USA, Remington, Bushmaster, Bushnell, Leupold, Aimpoint, PWS, Vortex Optics, Cor-Bon Ammunition, ERGO Grips, AmeriGlo Sights, Krause Publications, Comp Tac Victory Gear, The Beta Company, IDPA, MGM Targets, Rainier Ballistics, Rock Castle Shooting Center, SIG Sauer and was a Staff Photographer for Cabela’s in Sidney, NE. Yamil is also a Writer and Photographer for Guns & Ammo, Guns & Ammo SIP's and Gun Digest.
