
How to Use a BDC Reticle
![]() August 7th, 2021
August 7th, 2021
![]() 6 minute read
6 minute read
A while back on a shooting forum, one of the members stated “BDC reticles suck, always” and it got me thinking about it. Unfortunately, the feelings regarding BDC reticles seem to be either “love it” or “hate it”, with very little room for middle ground. In recent years, we’ve seen the market for low-power optics explode, and with that a boom in BDC reticle variants.
Are they perfect? No. Should we discount them entirely out of hand because of that? Let’s dig in a little deeper to decide.

What Is a BDC Reticle?
Bullet Drop Compensating (BDC) reticles are essentially a series of reference points along the vertical axis of a reticle that relates to the bullet’s flight path. The calculated trajectory is derived from the bullet type, muzzle velocity and typical environmental conditions the manufacturer deems appropriate.

Sometimes, a built-in ranging feature helps round out the package to provide everything the shooter needs to engage a distant target without having to do any complex calculations. This is why BDC reticles have been used for decades in tactical and sporting rifle scopes where you need to get hits on targets quickly.
Making It Work For You
There is a common misconception that unless you use the exact same set-up that the manufacturer used to design the reticle, then it’s pretty much useless. This isn’t always the case, but one needs to temper the expectation that BDC reticles can work ballistic miracles. BDC reticles excel in a fast-paced environment where targets are within, say, 600 yards. Depending on different factors, our trajectory may be a little high or low of the waterline, but on a practical torso target or pepper popper, that may not matter.

To maximize what we can get out of a BDC, we need to look at the reticle as a series of lines spaced a specific distance apart, irrelevant of what bullet type or muzzle velocity it may have been designed around. Most manufacturers will have a subtension sheet available that provides all of this information, allowing us to start “mapping” the reticle out.
The other vital tool that we’ll need is a ballistic calculator; but, like all ballistic programs, junk in equal junk out. To sufficiently map the reticle to our set-up, we’ll need to make sure the inputs for bullet type, bullet weight, ballistic coefficient, sight height and muzzle velocity are accurate. There are a number of calculators on the market, but I’ve been having good luck using the Strelok Pro app on my phone.
Mapping the Reticle
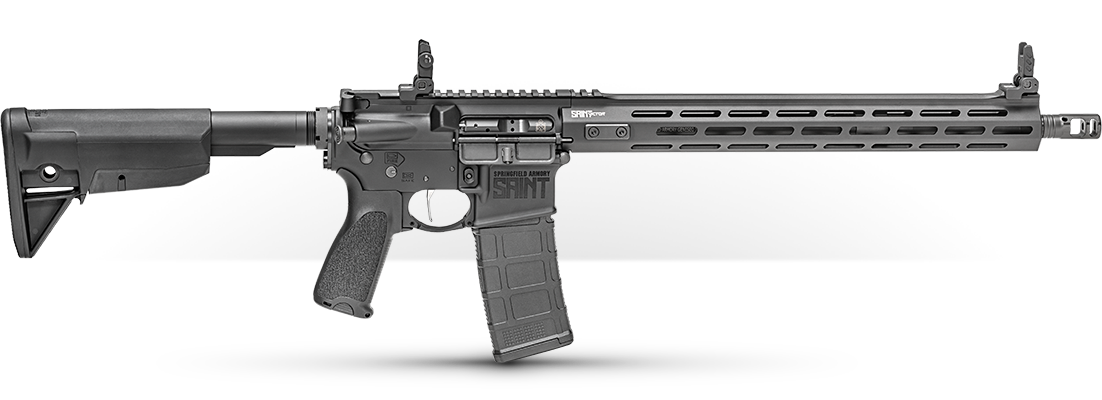
When we’re mapping the reticle, we’re trying to find the true range of the hash marks when using our selected ammunition and zeroing at a specific distance. Sometimes, this process is really easy, like the SAINT Victor and Vortex 1-6X optic combo that I have used for local carbine matches. Following the reticle manual and zeroing the scope as recommended, the true range of the reticle matches up almost perfectly to what they are supposed to be.
| Vortex AR-BDC Subtensions | Proposed Ranges | Calculated Bullet Drop From Rifle | True Range | Trajectory Difference From Design |
| 0/Crosshairs | 200 | 0.0 | Zero/200 | 0.0 |
| 2.4 | 300 | 2.4 | 300 | 0.0 |
| 5.6 | 400 | 5.4 | 405 | +0.2 |
| 9.5 | 500 | 9.4 | 502 | +0.1 |
| 14.6 | 600 | 14.2 | 607 | +0.4 |
However, let’s say we want to use something that will give us better performance out to 600 yards, so we start looking at the 75- to 77-gr. options. For argument’s sake here, we’ll use Black Hills 77-gr. OTM because I have good data for that ammunition out of a 16” barrel. If we just plugged in the info for the 77-gr. Sierra MatchKing using the same 200 yard zero, then our hash marks are going to be pretty significantly off.

We can true the reticle up to make the true range of the hash marks more closely match the design distances by tweaking the zero in our ballistic calculator. It only takes a few extra minutes on the front end, but adjusting the zero distance to 220 yards puts the true range of the stadia lines within 5 yards all the way out to 600 yards.
Obviously, it’s not practical to zero at 220 yards, but we can zero at 50 yards by adjusting our point of impact to be about ¼” high of our point of aim. Inside of 220 yards, we’ll just need to remember that our trajectory is going a little high over the crosshairs and to adjust accordingly.
We can apply this methodology to a different caliber and bullet altogether, in this case for a hunting application using .308 Nosler Ballistic Tips. If we try to run a 100-yard zero, we’ll find that the true range of the stadia is up to 70 yards off. Tweak the zero range to 220 yards, and everything lines up much better.
The Environmental Element
How much will environmental changes affect the accuracy of the reticle? The truth is probably not as much as you’d think if you’re shooting in the same general area throughout the year. Coming from a precision rifle background, I use density altitude (DA) in my ballistic calculations because it combines pressure, humidity, temperature, and altitude into a single value. This single value accounts for a wide variety of environmental conditions and simplifies the process of working out the DOPE for our rifles. Using the 77-gr. OTM as an example, if I run the numbers for the common density altitudes I’ll see throughout the year, I’m never more than 1 MOA off from the reticle out to 600 yards.

Wind
Wind is the bane of any long-range shooter’s existence, and compensating for wind can be especially challenging when using some BDC reticles. There are some scope reticles that have wind hold dots or hashes, but in some cases, the shooter is going to have to do the best they can. Again, this is why I don’t recommend a BDC for precision applications where you may only have a couple of rounds to hit a 1 MOA target.

That being said, even a simple reticle isn’t useless in the wind. I know that at 300 yards in 7-10 mph winds I can use the end of the 300-yard stadia as a hold point. This is also why it’s important to record data for your rifle so that you know what reference points to use in the reticle under certain wind conditions.
Live The Armory Life. The latest content straight to your inbox plus an automatic entry to each of our monthly gun giveaways!
Last Shots
I hope the above demonstrates that not all BDC reticles suck, in fact, they can be extremely useful in applications ranging from competition to duty use when you know how to use one. When selecting an optic and BDC reticle I encourage you to find the subtension sheets, run some quick numbers, and find the option that’s best going to fit your rifle and ammunition combination.
Of course, always verify those drops out to the farthest distance possible and keep a simple logbook that notes where you held, where it impacted, and where you held for wind. You’ll find yourself becoming a better rifleman that’s more confident in pushing the rifle out to extended ranges, which I believe is the ultimate goal of the BDC reticle.
Editor’s Note: Be sure to check out The Armory Life Forum, where you can comment about our daily articles, as well as just talk guns and gear. Click the “Go To Forum Thread” link below to jump in!
Join the Discussion
Featured in this article
Share


Continue Reading
Did you enjoy this article?

 101
101
Springfield Armory® recommends you seek qualified and competent training from a
certified instructor prior to handling any firearm and be sure to read your owner’s manual. These
articles and videos are considered to be suggestions and not recommendations from Springfield Armory. The views
and opinions expressed on this website are those of the authors and do not necessarily reflect the
views and opinions of Springfield Armory.
Product prices mentioned in articles and videos are current as of the date of publication.

Ian Kenney
Ian Kenney served as an infantryman in the U.S. Army just after 9/11 and is a veteran of the Global War on Terror. Ian is a life-long firearms enthusiast and competition shooter regularly participating in everything from rimfire to long-range precision matches. When not shooting or writing about shooting, Ian enjoys bushcrafting and hiking in the woods of Virginia.
