Unlike the SAINT rifles with their integral strip of Picatinny rail atop the receiver, mounting a scope on the Springfield Armory M1A requires a few more steps. But, if you don’t want to go the route of having a gunsmith do it for you, you can follow this handy guide (and matching video above) to do it yourself.

Making Choices
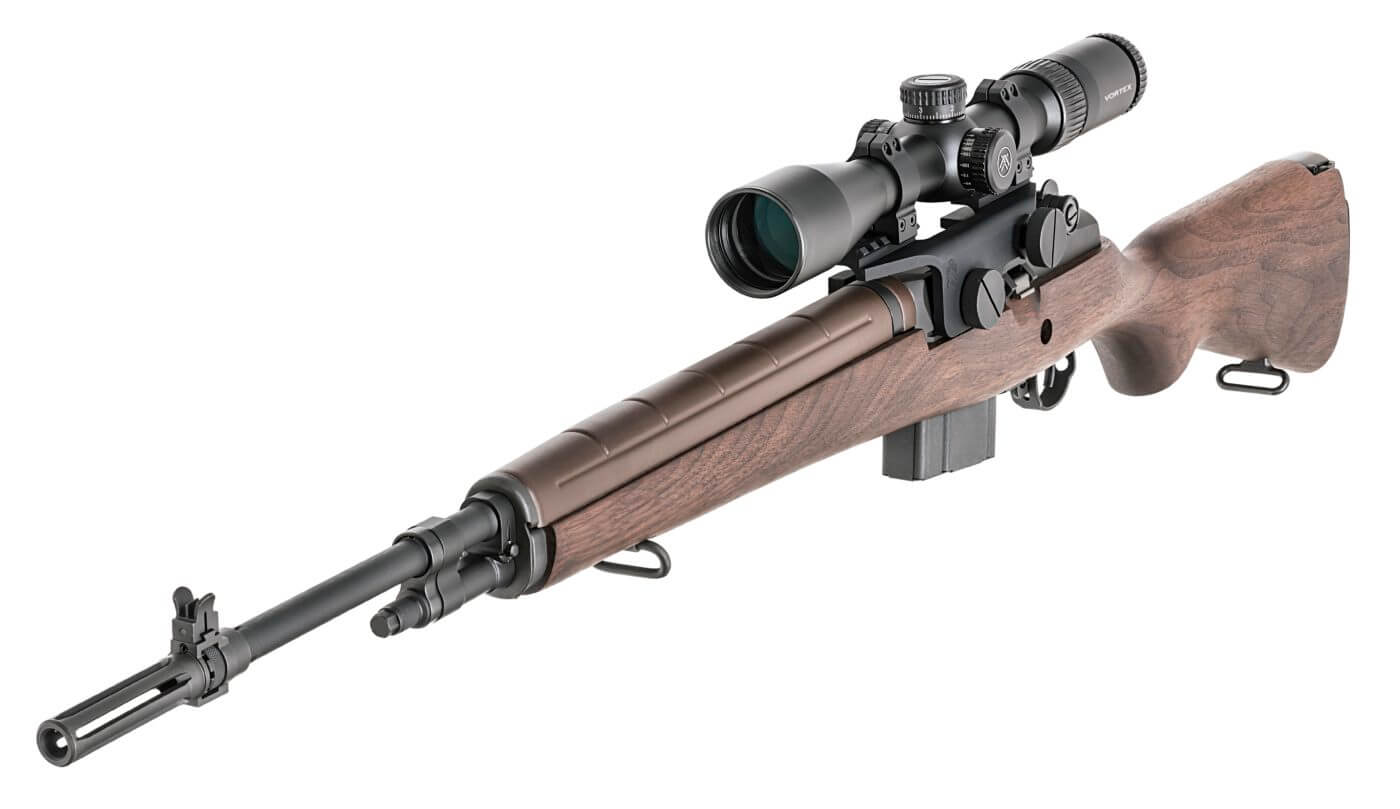
I am often asked if an M1A can have a scope mounted on it, and if so, what kind of mount I recommend. My first response is, “Yes, you can absolutely mount a scope on an M1A.” And my recommendation is always the Springfield Armory scope mounts. They work great, whether you choose the steel or aluminum version (the latter of which I am covering here). I have each mount installed on a few different M1As and could not be happier with the quality and performance.
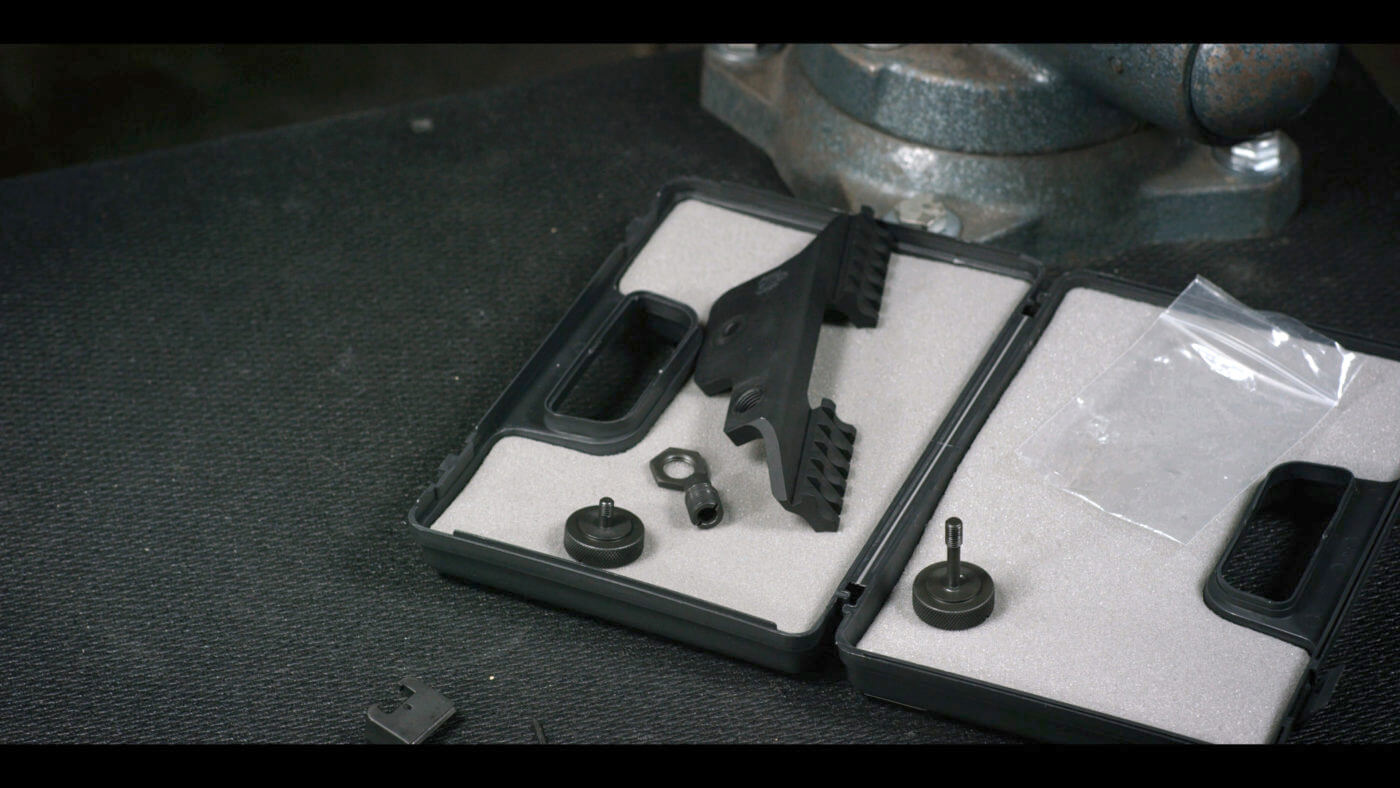
Which mount do I prefer? It’s not a quick answer for me, as I have several M1As and each has a specific task. I like my SOCOM 16 and Scout M1As to be quick, light and easy handling, so for them, I have installed the aluminum mount. For my Loaded and National Match M1As I use the steel mount, because the added weight is always a welcome addition. The slight increase in weight helps the rifle to be a little more stable in virtually every shooting condition and position.

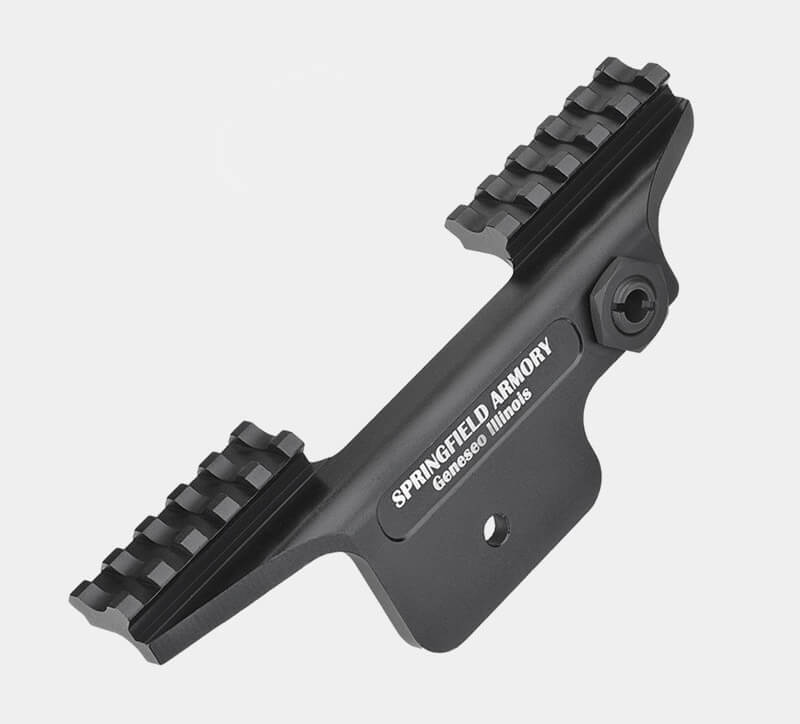
The steel mount locks into the receiver and once it is attached properly, it is rock solid. The softer aluminum mount is hammered against the side of the receiver as it is being mounted. This method works very well too and makes for an extremely solid attachment.
Mounting Guide
The included instructions that come with your mount have a very detailed explanation on how to install. I was installing an aluminum scope mount in the video above, so I will cover the main steps on how to install that particular one here.
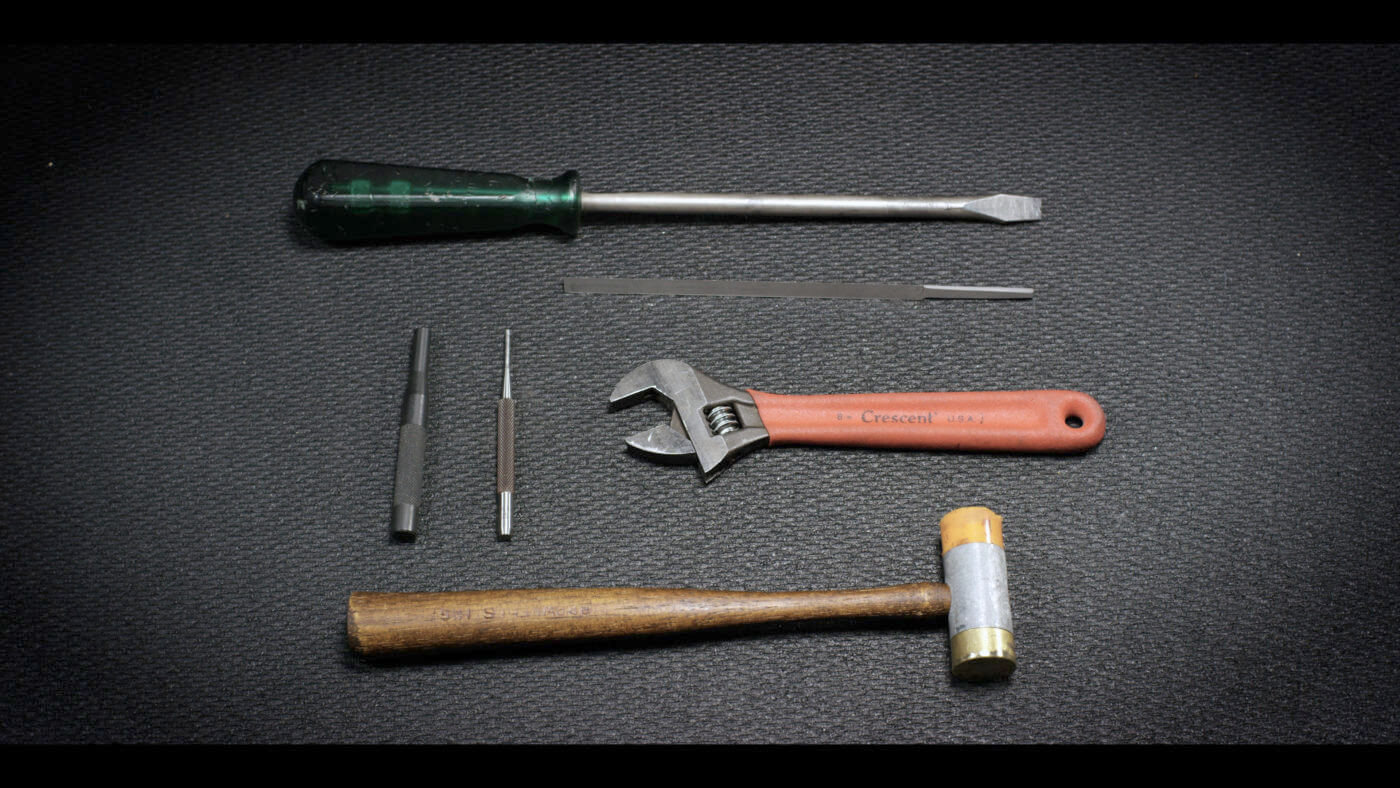
Tools you will need are as follows:
- Large flat nose screwdriver
- Small triangle file
- 3/32” punch
- ¼” punch
- ¾” Wrench
- Mallet
First, ensure that your rifle is unloaded and clear. Put the rear sight of the M1A in the lowest position. Let the bolt forward and turn the rifle over. Remove the trigger assembly, and then separate the barreled action from the stock.
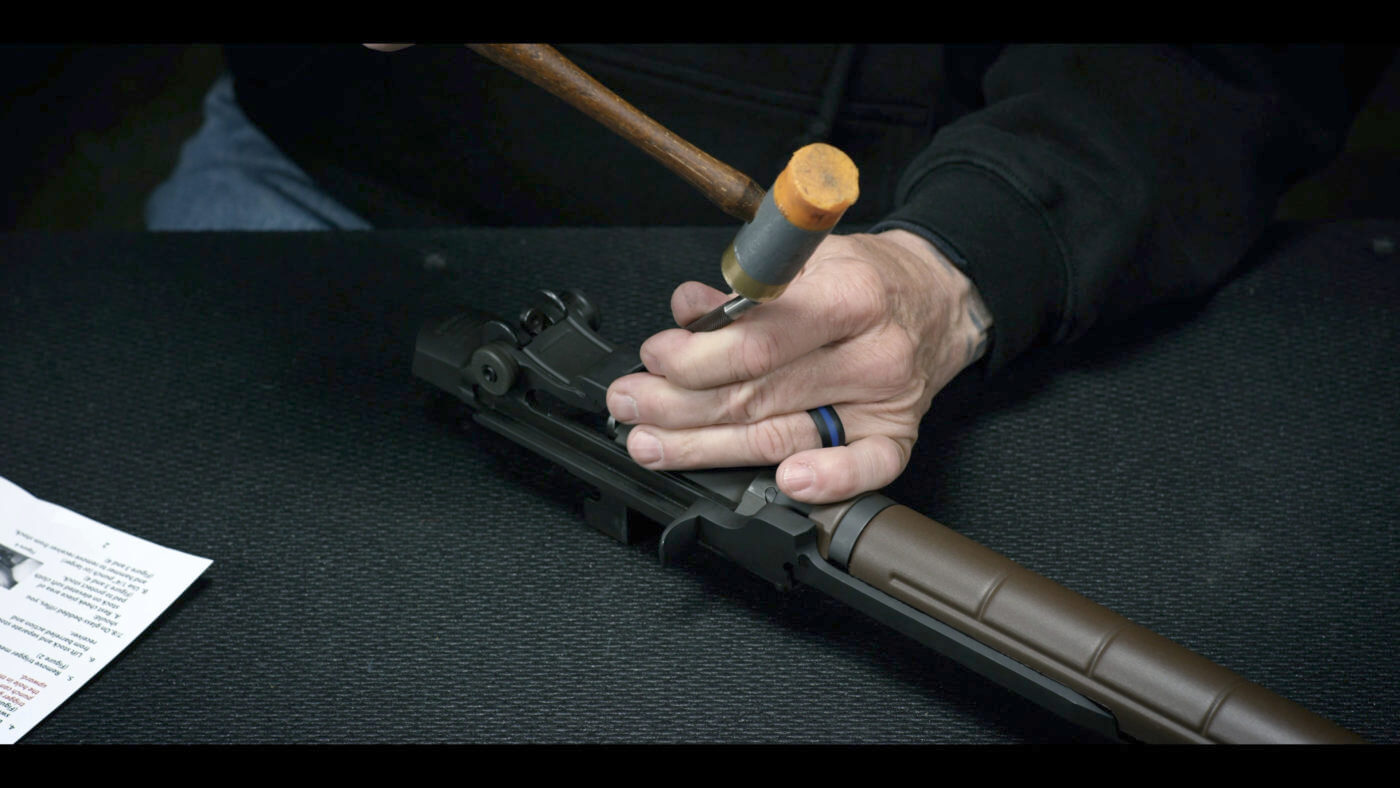
Using the 3/32” punch, drive out the pin from the stripper clip guide from top to bottom. Next, using your mallet, drive out the stripper clip guide from right to left. Next, install the new mount guide in the stripper clip guide groove, and check fitment.
Live The Armory Life. The latest content straight to your inbox plus an automatic entry to each of our monthly gun giveaways!
If the fit is too tight, carefully file on the new clip guide. However, be sure not remove too much material. Once this is done, tap the new mount guide into the groove. Then align the pin hole in the clip guide, and tap the new pin into the clip guide.
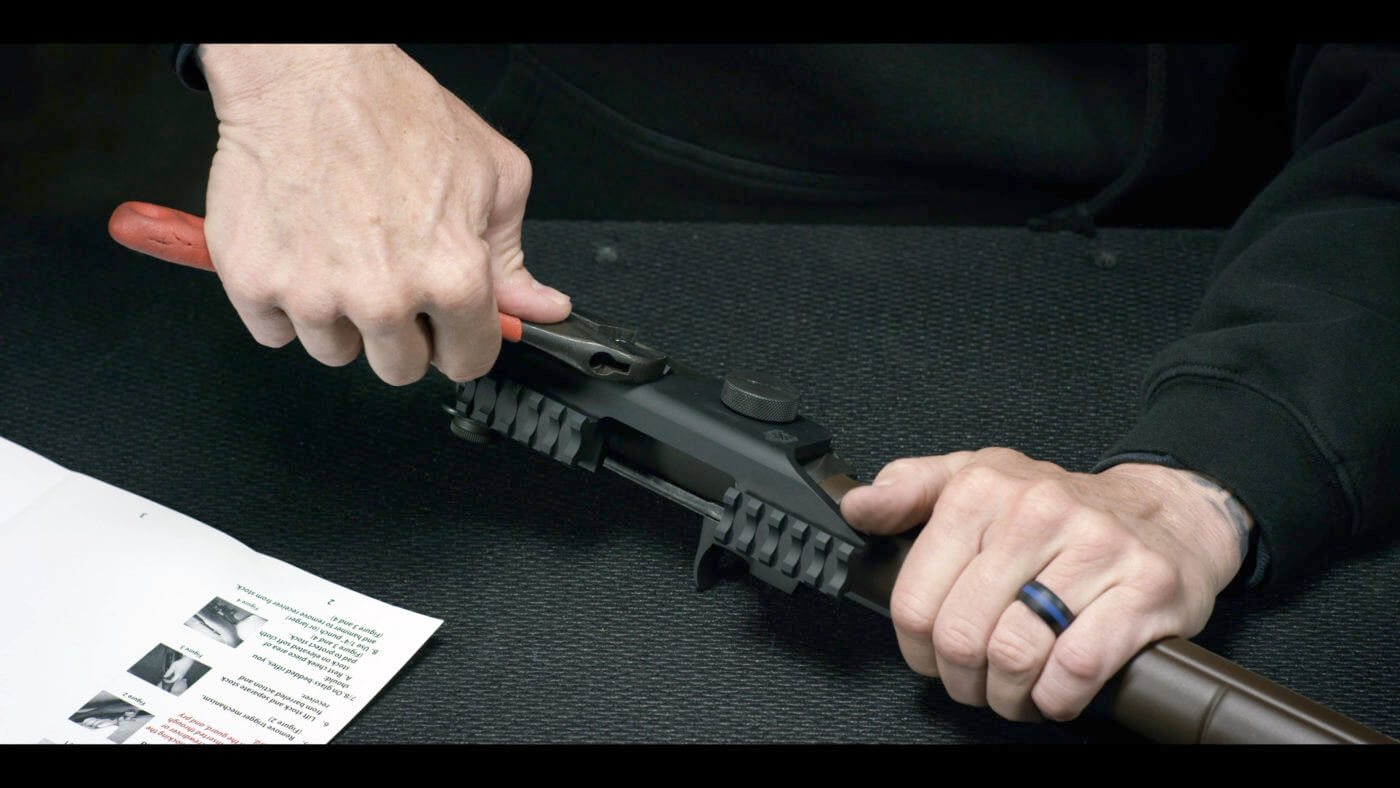
Next, align the raised guides on the scope mount with the slots on the receiver. You will now install the front screw and hand tighten it. Once hand tightened, you will then tighten it further with your screwdriver.
Here comes the time for the mallet. Properly seating the mount requires striking it with the mallet at the front and to the rear of the mounting screw, and then tightening the screw. Repeat this process until you can no longer tighten the screw. The aluminum scope mount is now fully fit and seated to this receiver and won’t fit any other.

Install the rear screw bushing until it just contacts the receiver, and then install the lock nut using your ¾” wrench. Be sure to bring the wrench with you when doing an initial zeroing of your rifle, as you may need to make windage adjustments. Insert the rear screw and tighten with your screwdriver. You now may reinstall the barreled action into the stock and lock in the trigger assembly. Your mount is installed and you are ready to mount your scope and zero the rifle.
The Result
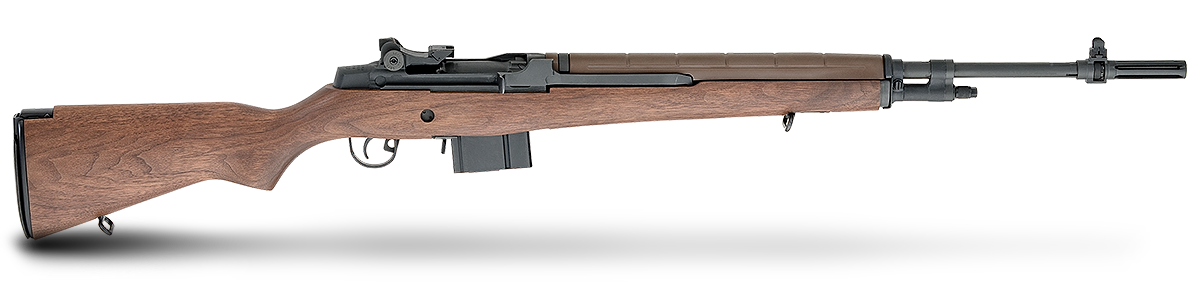
Both the steel and the aluminum mounts are specifically designed to keep the ejection port clear and allow easy access to the operating rod. With the scope removed, you can also still see and use the factory iron sights, meaning you don’t have to also remove the mount to use your irons. Once the mount is installed, there is really never a reason to have to remove it. You can disassemble, clean, maintain, and replace parts on your rifle without removing the mount.
The most important tip I can give to anyone that puts a mount and scope on an M1A is to FOLLOW THE INSTRUCTIONS! I know that is sometimes hard to do, especially if you’re a know-it-all like I am. But you and your impressive shot groups will thank me in the end.
Editor’s Note: Please be sure to check out The Armory Life Forum, where you can comment about our daily articles, as well as just talk guns and gear. Click the “Go To Forum Thread” link below to jump in!
Join the Discussion
Featured in this video
Share


Continue Reading
Did you enjoy this video?

 289
289
Springfield Armory® recommends you seek qualified and competent training from a
certified instructor prior to handling any firearm and be sure to read your owner’s manual. These
articles and videos are considered to be suggestions and not recommendations from Springfield Armory. The views
and opinions expressed on this website are those of the authors and do not necessarily reflect the
views and opinions of Springfield Armory.
Product prices mentioned in articles and videos are current as of the date of publication.

Steve Horsman
Steve Horsman has extensive experience serving in military and law enforcement. He spent four years in the U.S.M.C. and followed with 27 years of experience as a police officer. While in law enforcement, he served as an undercover officer, a member of S.W.A.T. and as a police sniper. Adding to his already impressive resume are 30 years of competition shooting.
