
Hellcat Threaded Barrel and Compensator Kit: Installation and Review
![]() June 5th, 2023
June 5th, 2023
![]() 7 minute read
7 minute read
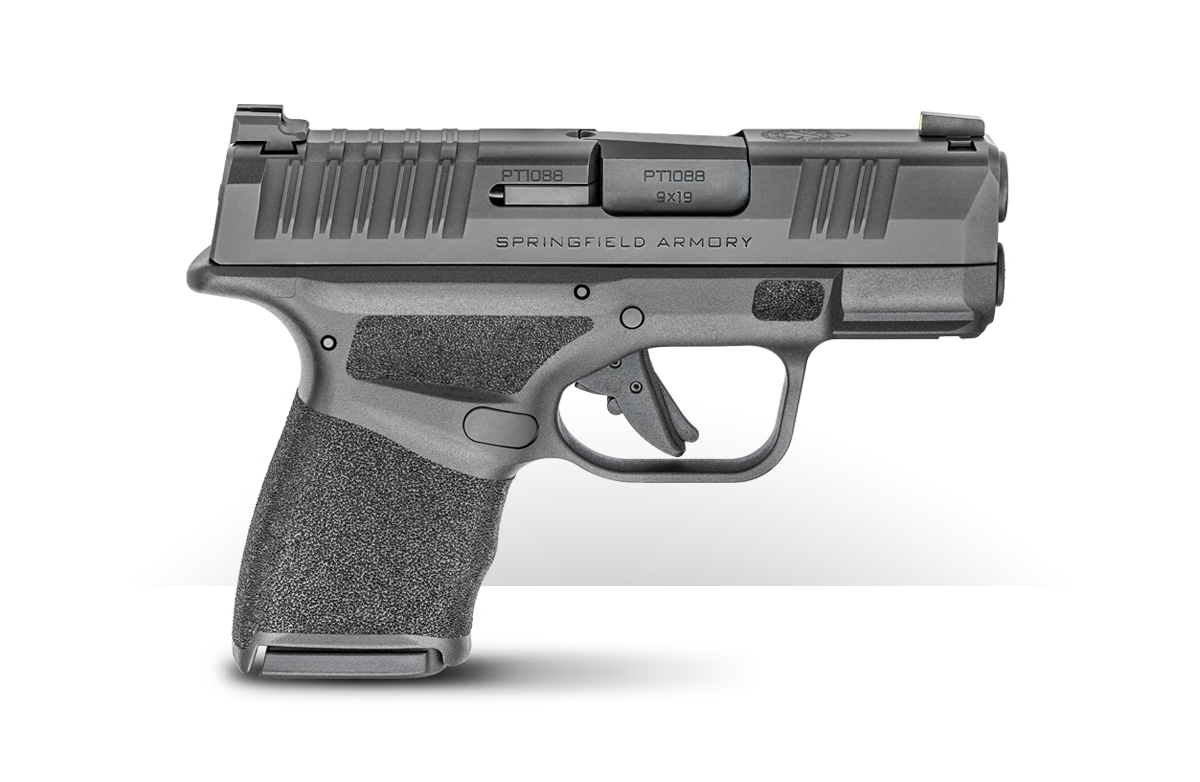
The Hellcat is widely regarded as an excellent choice for concealed carry and personal protection. Its combination of small, concealable size and increased capacity over similarly sized guns made it a very popular choice among shooters when it came to market.

With the growing number of people buying defensive firearms over the last few years, there has been a matching growth in the number of gun owners heading to the range to shoot recreationally. Frequent range trips and shooting more drills not only improve a shooter’s skill with their chosen firearm, but often lead that shooter to look for new ways to engage in the shooting sports with it.
For many Hellcat owners, the release of the Springfield Hellcat RDP presented an exciting opportunity to get the carry gun they love with performance features that would enhance their shooting experience at the range. Including a red dot optic and a compensator, a rare feature set on a pistol of this size, meant that shooters could have the defensive performance of the Hellcat in an even more flat-shooting format.

Many standard Hellcat owners expressed interest in the RDP, but understandably hesitated to sell or trade their trusted carry gun for the new RDP variant. However, a new offering from Springfield Armory is poised to allow Hellcat owners to enhance their own trusted carry pistol with a brand-new threaded barrel and compensator set.
The Hellcat Threaded Barrel with Compensator set is easily dropped in and doesn’t require any gunsmithing or fitting to operate correctly. It also features Springfield’s patent-pending self-indexing muzzle device system. (To learn more about the self-indexing compensator, click here.) This system eliminates the hassle of trying to perfect the timing of the compensator with shims when it is threaded onto the barrel. A spring-loaded arm on the bottom of the 8082 aluminum compensator locks into a groove on the barrel to provide a perfect fit without the need for trial and error in the mounting process.

The barrel itself is lengthened to 3.8” (over the 3” barrel of the standard Hellcat) to accommodate the muzzle device and is threaded ½x28. It sports a Melonite finish for added durability. Both the barrel and the compensator from the set are easily installed at home in a manner of minutes.
Installing the Kit
The first step is to ensure that there is no ammunition anywhere near the area where you intend to install the parts. This means loose rounds, loaded magazines and even ammunition for other firearms. It is essential for your safety and the safety of others that you do not let ammunition near the firearm during maintenance or installations.

With ammo removed from the area, point the Hellcat in a safe direction with your finger off the trigger and engage the magazine release. Remove the magazine and place it to the side after confirming it does not contain any ammo.
Now is one of the most crucial steps of the process. Bring the slide rearward and push the slide release lever upwards to lock the slide to the rear. Inspect the chamber fully to ensure there is no ammunition in the chamber or anywhere else inside the gun.
Live The Armory Life. The latest content straight to your inbox plus an automatic entry to each of our monthly gun giveaways!
Once you have confirmed that the gun is completely free of ammunition, you can begin the short and sweet process of installing the set.
With the slide locked to the rear and the magazine removed, slide the disassembly lever on the frame of the Hellcat upwards towards the top of the slide. Once the lever has slid upwards, pull back on the slide to keep the tension and use the slide release to let the slide forward slowly.

Point the Hellcat in a safe direction and keeping your hand on the slide, pull the trigger. You should be able to pull the slide straight forward and off of the frame. Now that the slide has been taken off, place the frame of the Hellcat to the side.
Begin taking apart the slide assembly by removing the recoil spring assembly from the slide. This is done by pushing on the flat area at the back of the spring assembly to release it from where it is sitting in contact with the gun’s barrel. With that assembly removed, all you’ll have to do is draw the barrel up and out of the slide.

Now it’s time to install the new threaded barrel and compensator set. Remove the contents of the barrel and comp set from its packaging.
If you plan to use the compensator, place the included thread protector for the barrel in a safe place so you can find it if you want to use it in the future. The barrel and compensator will come assembled in the packaging. To install them, they’ll first have to be separated.
Flip the barrel upside down, and you’ll see a spring-loaded arm sticking out of the bottom of the compensator. Push it down and turn the compensator to loosen it. Continue to thread the compensator off the barrel’s threads while holding down on the lever to ensure it does not snag during removal.

Once the compensator is all the way off and the barrel threads are exposed, you can place the barrel down and forward into the slide, reversing the technique you used to remove the original barrel. The threaded portion should be sticking out of the end of the slide.
With the threaded barrel in place, resting firmly with the chamber against its cutout in the slide, place the recoil spring assembly back into the slide. Push the flat portion of the recoil spring assembly you did during disassembly to compress it slightly and let it lock into place against its cutout in the barrel.

With the recoil spring assembly now in place, the barrel should be stable when you install the compensator. Depress the spring-loaded arm on the bottom of the compensator once again and push the compensator gently into contact with the threads on the end of the barrel. Rotate the compensator onto the threads. As you reach the bottom of the threads and the compensator is almost aligned, it’s time to let the self-indexing system work its magic.
Rotate it clockwise to tighten it — all the way until it stops. Now, you’ll need to turn it back about ½ turn and use your thumb to push in the small lever. While depressing the lever, continue again to screw the compensator onto the barrel until it can go no further. It should be visibly out of alignment at this point. Release the pressure on the lever, and reverse the direction of the compensator slowly, for about ½ to ¾ turn. You will feel and hear the key catch into the notch — and at this point, your compensator is properly installed and ready to go. Verify that it does not turn in either direction and that the single port is straight up, in front of the front sight.

With that done, you can now place the slide on the frame and draw it rearward, pushing up on the slide release to lock the slide of the Hellcat to the rear. With the slide locked in position, push the disassembly lever back down toward the bottom of the frame. You can now release the slide gently and the gun is reassembled. It is a good idea to check the function of the gun’s mechanisms after maintenance and installation; just make sure you do so without any ammunition near the firearm. Once you’ve checked that all of the controls on the gun, including the trigger, are functional, you’re all set and can head to the range to begin enjoying the performance of your newly enhanced Hellcat.
Final Thoughts
This kit adds an appealing new feature to the original Hellcat pistol. In my experience, running it in the gun noticeably reduces muzzle rise when shooting. As expected, the gun remains utterly reliable with the kit installed. That makes sense, as this is a factory parts kit — not something from a third party.
A threaded barrel is also worth considering for the Hellcat if only to add a sound suppressor. However, the included compensator adds significant value to this kit. Unlike a suppressor, the comp is not regulated by federal law. Also, the installation of the barrel kit is a breeze for users of all skill levels.
Bottom line: this upgrade is undoubtedly a worthwhile investment for Hellcat owners seeking enhanced customization and functionality in their compact firearms.
Editor’s Note: Please be sure to check out The Armory Life Forum, where you can comment about our daily articles, as well as just talk guns and gear. Click the “Go To Forum Thread” link below to jump in!
Join the Discussion
Featured in this article

Share


Continue Reading
Did you enjoy this article?

 109
109
Springfield Armory® recommends you seek qualified and competent training from a
certified instructor prior to handling any firearm and be sure to read your owner’s manual. These
articles and videos are considered to be suggestions and not recommendations from Springfield Armory. The views
and opinions expressed on this website are those of the authors and do not necessarily reflect the
views and opinions of Springfield Armory.
Product prices mentioned in articles and videos are current as of the date of publication.

Sam Weitzner
Sam’s interest in guns began at an early age with a love for military history. During high school, Sam began taking classes with Renaissance Firearms Instruction. Over several years he learned everything from basic gun safety to advanced competition shooting techniques. Years later he continues to work with Renaissance as a firearms instructor and content creator. He has a fondness for all guns and shooting disciplines, but especially enjoys handguns. He is currently pursuing a career in law enforcement.
