
In today’s article, Steve Horsman gives us a step-by-step process for how to disassemble and clean your 1911 pistols. As with any firearm related activity, The Armory Life encourages you to follow the common safety rules when cleaning your handguns.
The Springfield Armory 1911 pistols are extremely popular for self-defense, competition, target shooting and hunting. Both experienced shooters and first-time gun buyers find a great deal of quality and value throughout the line.

The 1911 is unique in many ways. It was first adopted by the United States armed forces for its issued handgun in 1911. I won’t go into that, as you can find out the whole story here. What sets the 1911 apart from most all other current popular handguns is that it is a gun from the era of walnut and steel, features a single-action trigger system, external manual safety, and a grip safety on the backstrap. And in my opinion, it also has the most intuitive grip angle of handguns sold today.

First Steps to Cleaning Your 1911
When it comes to maintaining your 1911, it is one of the more simple handguns to fieldstrip, clean and lubricate. I personally think that Springfield Armory makes the best 1911 pistols on the market, and will be working on the Stainless Loaded model in this video you can see at the top of the page.
In that video, I discuss in detail basic firearms care/maintenance of the 1911 pistol. The first thing any gun owner should do after they purchase a new gun is to read the included owner’s manual. While the manual is included with your Springfield Armory 1911, you can also find a digital copy of it here.
The most important rules to follow when it comes to any type of firearm are the four safety rules:
- Treat every firearm as if it is loaded.
- Never point the muzzle at anything you don’t want to destroy.
- Keep your finger off the trigger until you have made the decision to shoot.
- Be sure you have positively identified your target and what surrounds it.
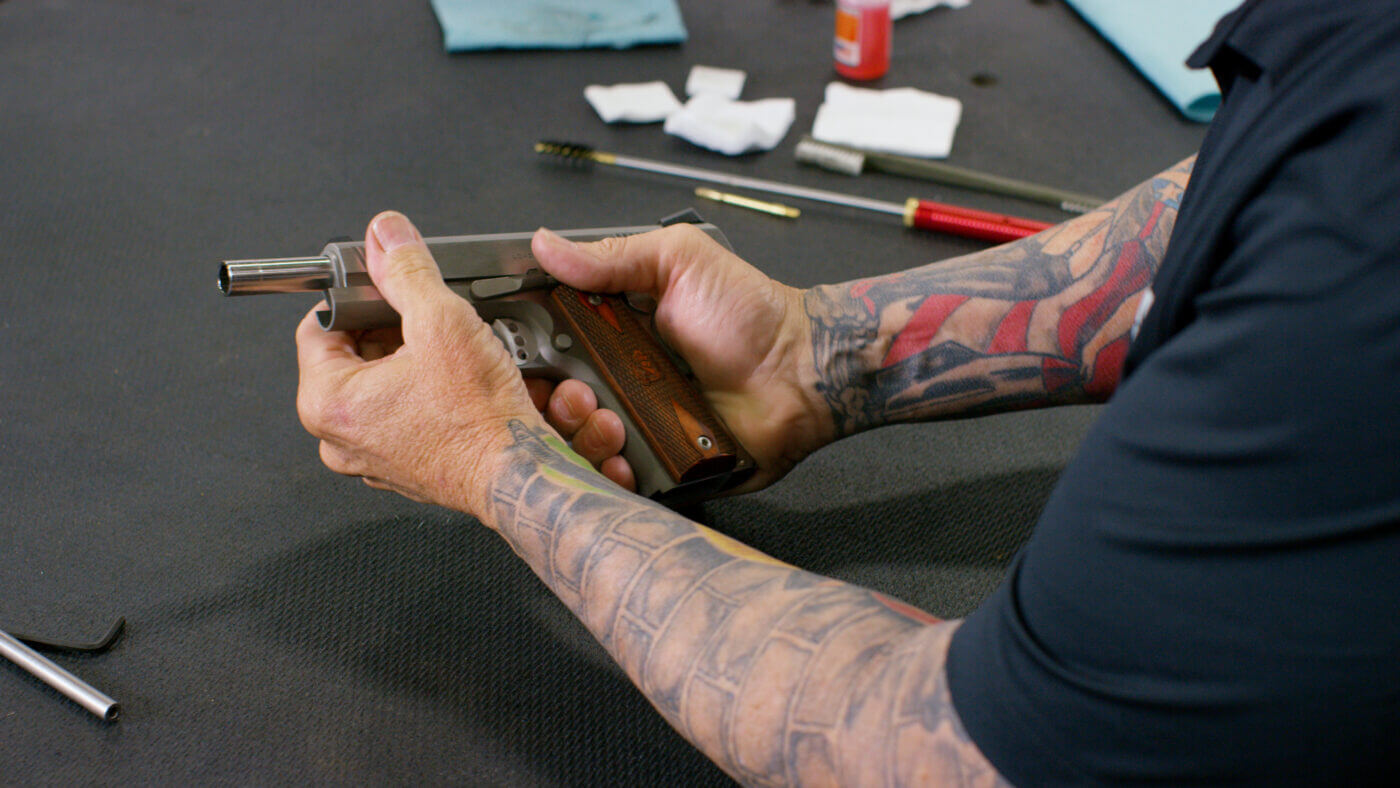
The first thing I do is remove the magazine, and then I lock the slide back by pulling the slide to the rear with my support hand and pushing the slide stop up with my primary hand. This allows me to physically and visually inspect the chamber and magazine well to ensure there are no rounds in the gun. Always make sure the firearm is unloaded and clear.
How to Disassemble a 1911 Step-by-Step
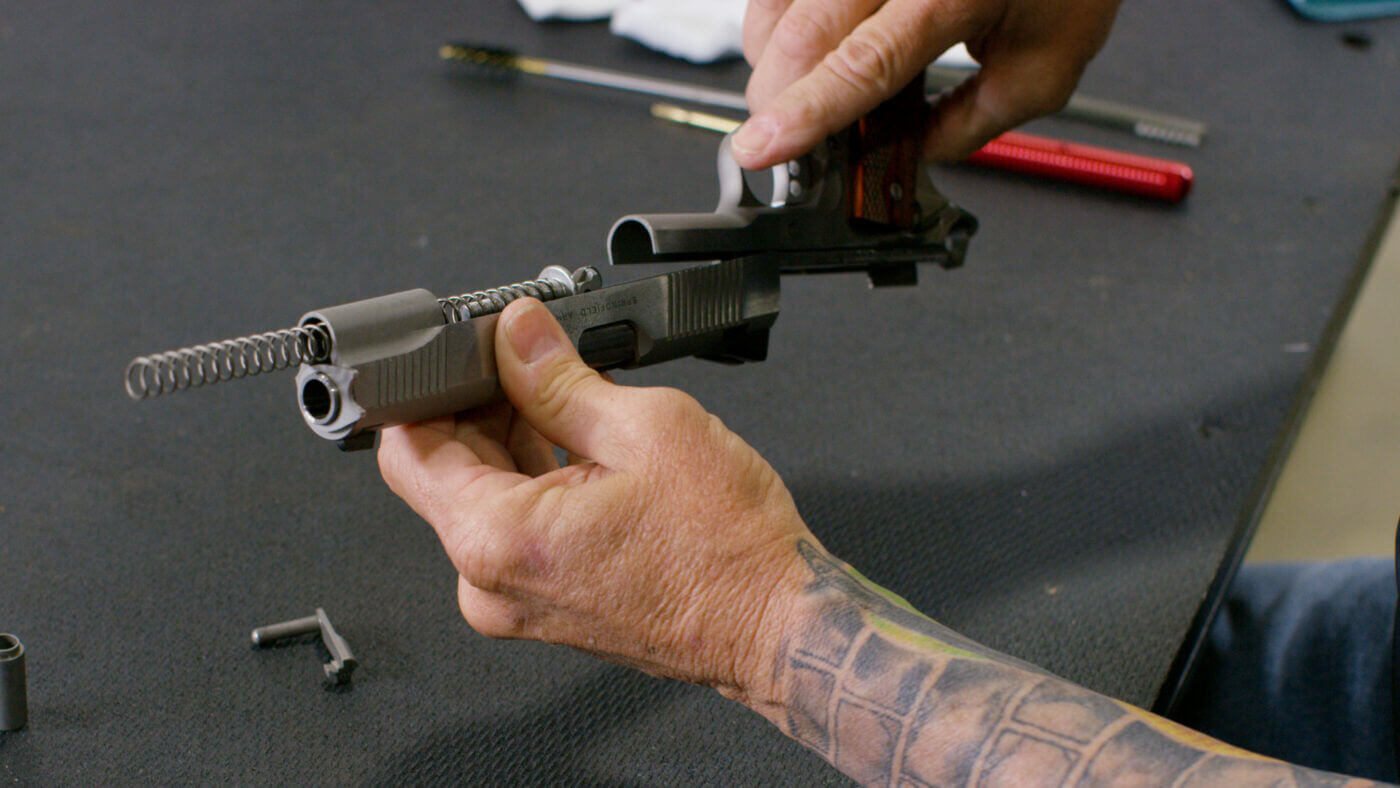
There are two ways to field strip the 1911, and the owner’s manual shows probably the easier way for the new 1911 owner. The way I do it is to unscrew the front portion of the two-piece recoil spring guide rod, and pull it out via the front part of the slide. From here I pull the slide back to the point where the slide stop engages the disassembly notch. I then push the slide stop from the right side of the frame, out towards the left side of the frame.
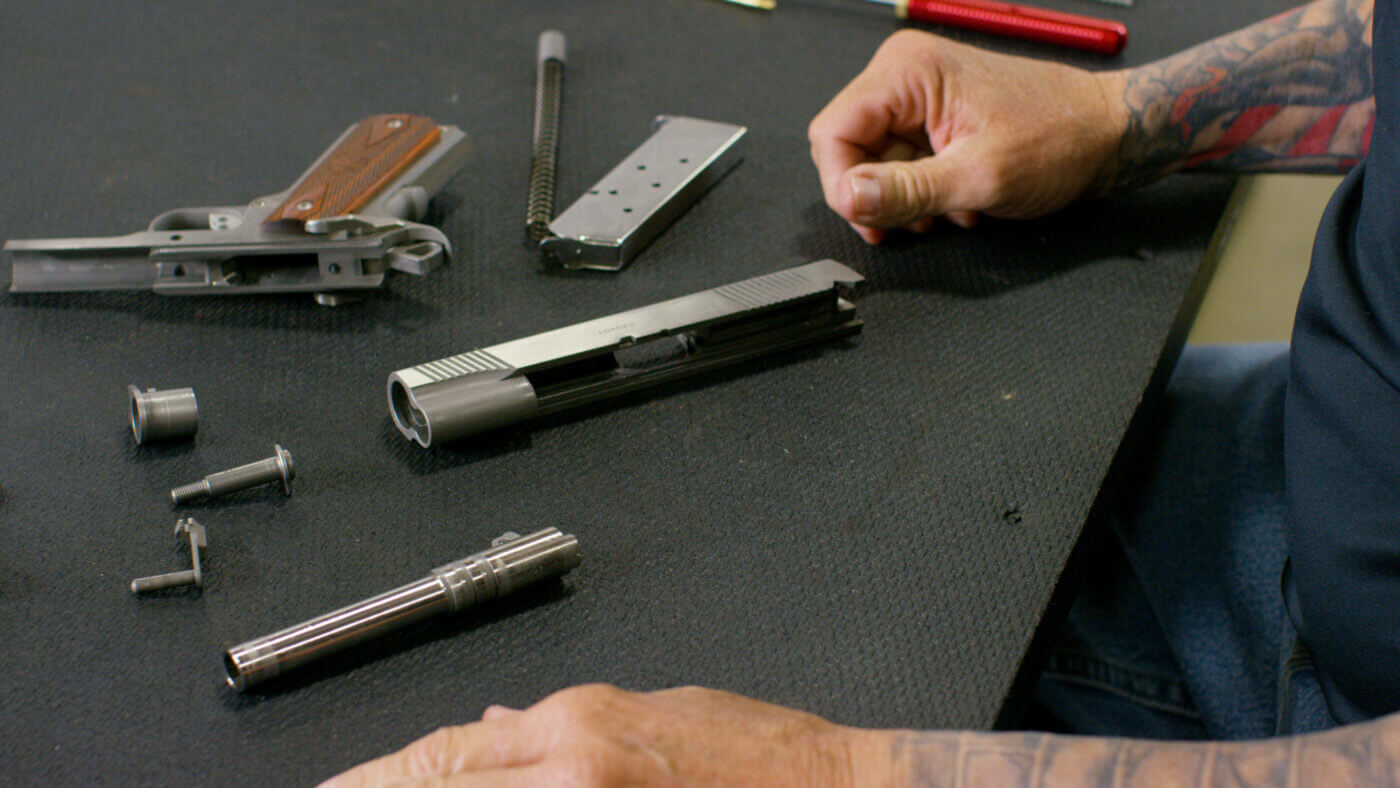
Once out, I slowly allow the slide to move forward, and I will wrap my hand around the bottom of the slide to ensure the recoil spring and guide rod don’t go shooting across the room. Once I have the slide off, I will relax my grip on the recoil spring and guide rod, allowing it to be removed from the slide.
From here, all that is left is to remove the bushing, recoil spring plug and barrel. Turn the bushing until the bushing notch engages the notch in the frame, and you can then remove the bushing. With the bushing out, remove the recoil spring plug, then the barrel can be removed by pulling it forward toward the muzzle end of the slide. Your 1911 is now field-stripped.
Cleaning Tips
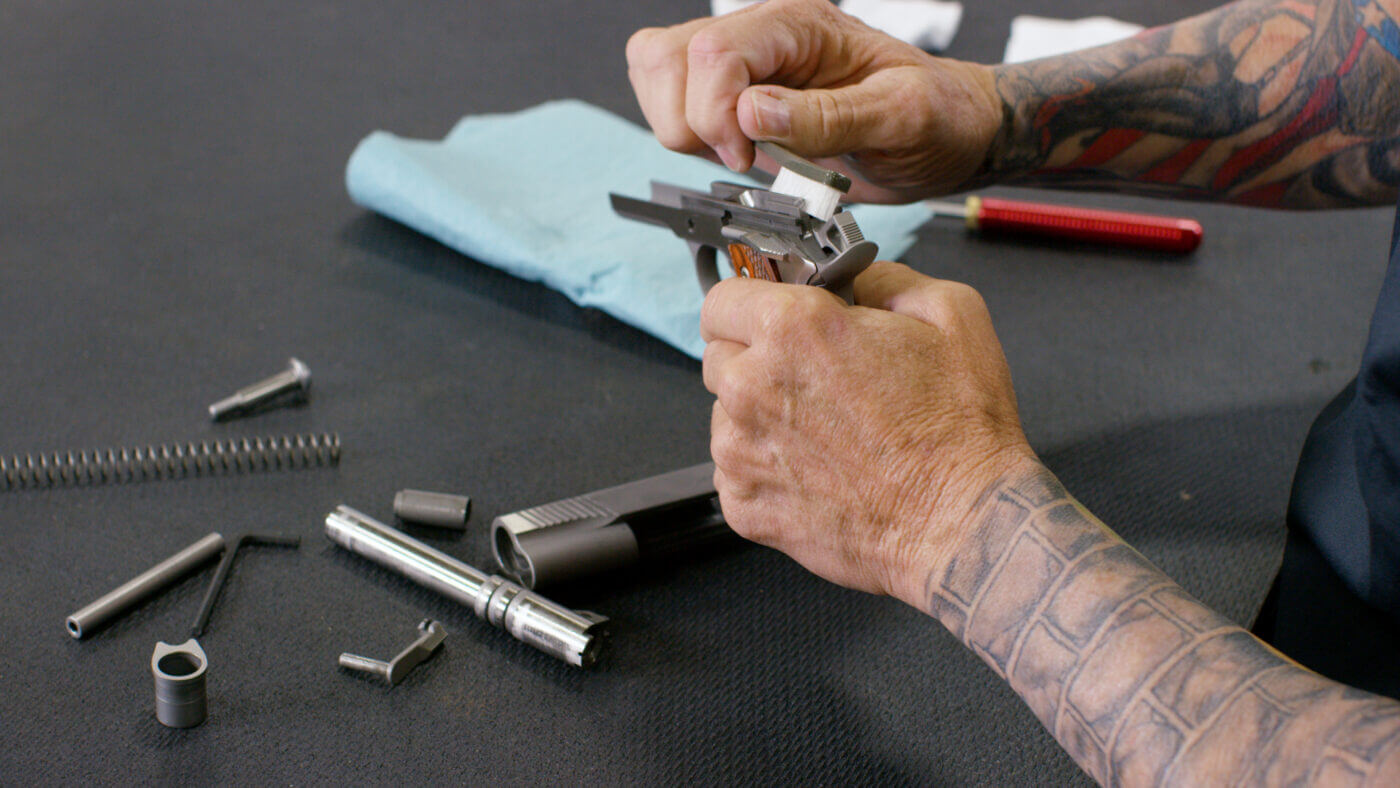
As I fieldstrip I separate the parts and, once I start cleaning, I like to clean the barrel first. I will run a few patches with bore solvent through the bore, from the chamber end toward the muzzle. From here, I will put a bronze/brass bore brush on my cleaning rod and run it through the barrel 10 to 20 times, depending on how dirty my gun is. After the brush, I will go back to a few solvent soaked patches, then move on to clean, dry patches until they come out clean.
Moving on to the frame, I like to use my M16 brush to brush and loosen any fouling. The M16 brush is a toothbrush-looking tool, but with a strip of small bristles on the opposite end. Once the fouling is loosened up, I will wipe it off with a red shop rag, patches and Q-tips. Once I am satisfied that the frame is clean, I move on to the slide, repeating the same process that I used for cleaning the frame. I then wipe the recoil spring, guide rod and bushing off with a red shop rag. Obviously, you can use any kind of rag, paper towels, patches of your choice.
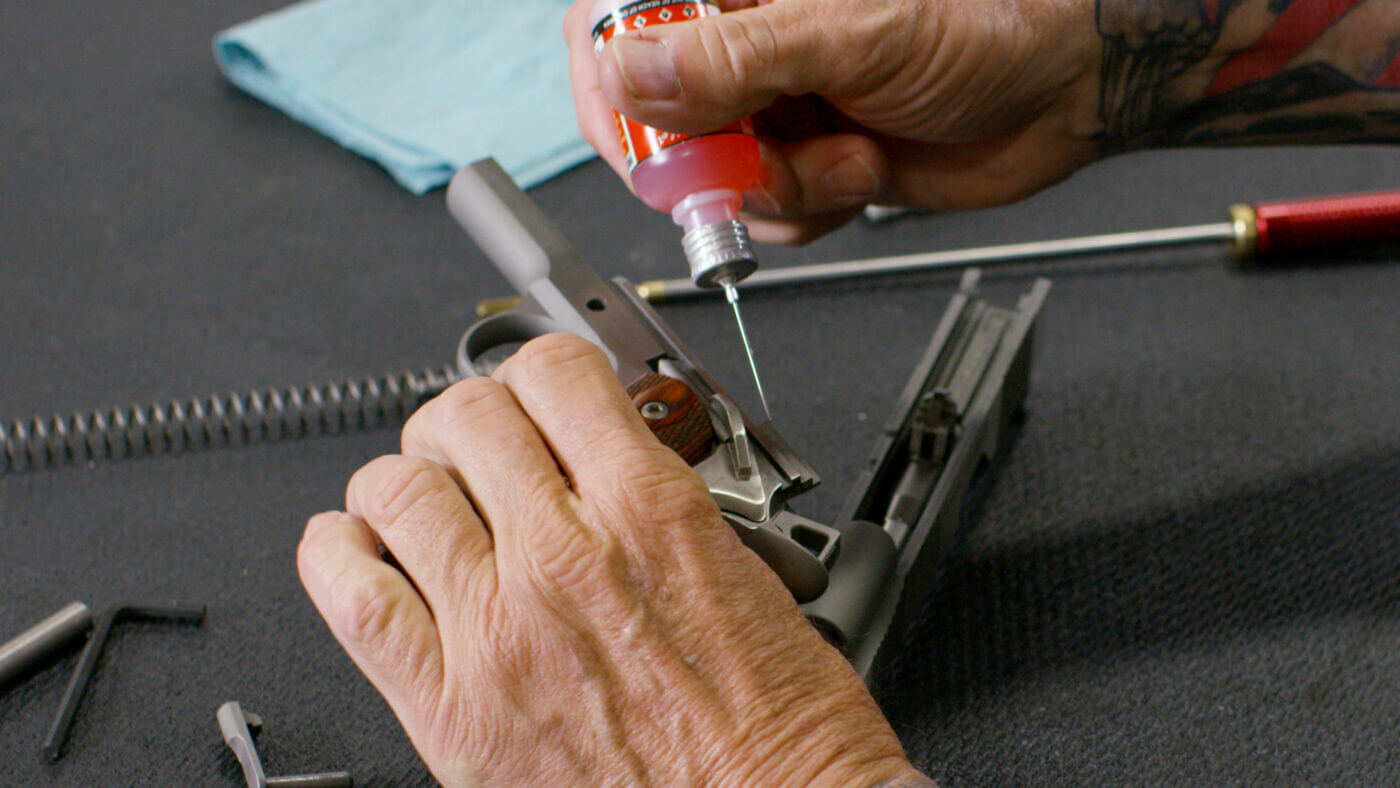
When I oil my 1911 pistols, I usually use a light oil, as the fit of my 1911 pistols is pretty tight. I like to use needle oilers, as it allows me to get the oil exactly where I want it. I run a bead on the frame rails and the slide rails. You don’t need much, so experiment with how much oil to use on your 1911. I will also put a few drops on the external part of the barrel and spread it out all over it. On the underside of the barrel is the link, and I will also put a little oil on that. I also put a few drops on the recoil guide rod and spring. I can now reassemble the 1911.
Back-Tracking
I first put the barrel back in the slide, put the bushing on the barrel and then install it back in the notch in the slide. Rotate the bushing in the slide, which will allow you to install the recoil spring plug. From here, I install the recoil spring — with the open end of the spring toward the muzzle — into the spring plug. Then install the short portion of the recoil guide rod into the closed end of the spring.
Live The Armory Life. The latest content straight to your inbox plus an automatic entry to each of our monthly gun giveaways!
I compress the guide rod forward and down, allowing me to press the back part of the guide rod down to where it engages the front of the link on the bottom of the barrel. From here, I hold the spring and guide rod down against the underside of the barrel so I can fit the frame and slide together to where the link matches up with the hole on the frame through which the slide stop passes.
Install the slide stop into the frame from the left to the right and press it into the disassembly notch. Once it is in, pull the slide back and push the slide stop up, which locks the slide open. Your last step is to install the front portion of the full-length guide rod by installing it in through the hole in the recoil spring plug. Screw it together with the included hex wrench and tighten it down.
Conclusion
Your 1911 is now assembled. Like I mentioned earlier in this article, please read the instruction manual that came with your gun if you are unfamiliar with any of the parts or process of how to fieldstrip and maintain your 1911.
Editor’s Note: Please be sure to check out The Armory Life Forum, where you can comment about our daily articles, as well as just talk guns and gear. Click the “Go To Forum Thread” link below to jump in!
Join the Discussion
Featured in this video

Share


Continue Reading
Did you enjoy this video?

 434
434
Springfield Armory® recommends you seek qualified and competent training from a
certified instructor prior to handling any firearm and be sure to read your owner’s manual. These
articles and videos are considered to be suggestions and not recommendations from Springfield Armory. The views
and opinions expressed on this website are those of the authors and do not necessarily reflect the
views and opinions of Springfield Armory.
Product prices mentioned in articles and videos are current as of the date of publication.

Steve Horsman
Steve Horsman has extensive experience serving in military and law enforcement. He spent four years in the U.S.M.C. and followed with 27 years of experience as a police officer. While in law enforcement, he served as an undercover officer, a member of S.W.A.T. and as a police sniper. Adding to his already impressive resume are 30 years of competition shooting.
